You are here: SKB Home » HRMS Payroll » User Guide » Defining the Payroll Calendar
Defining the Payroll Calendar
The Team Planning is based on the Payroll Calendar. Any changes made in the calendar after having generated the plannings imply manual modification of the concerned plannings.
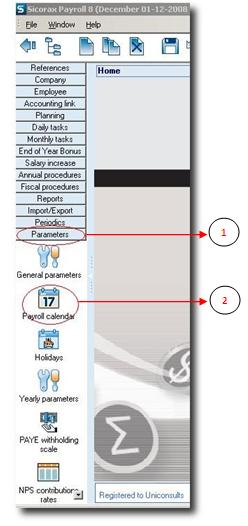
Step 1 Click on in the Menu Parameters
Step 2 Click on the icon “Payroll Calendar”. The Payroll Calendar is displayed
The screen is divided into 3, namely the “Months”, “Weeks” and “Fortnights” sections.
1st part of screen:
Step 3: Enter the Year of the pay-period
Step 4: Choose the name of the month from the list
Step 5: Enter the Start Date of the pay-period
Step 6: Enter the End-Date of the pay-period
Step 7: Enter the pay-date to be used during bank transfer
The next step is to let Sicorax Payroll update correctly the weeks for the year created above:
- Step 8: Click on the “Update Weeks” button at the bottom of the screen.
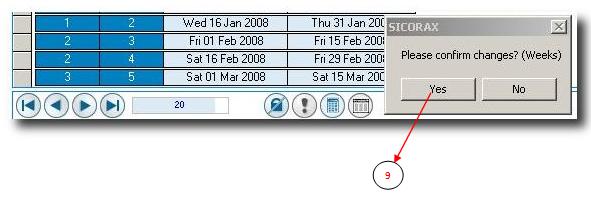
- Step 9: The Confirm Weeks dialogue box appears - Confirm by clicking on YES
- Step 10: The Confirm Fortnights dialogue box appears - Confirm by clicking on YES
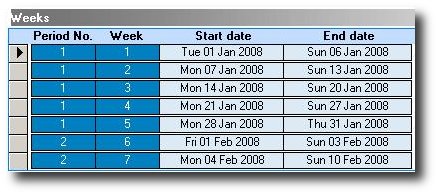
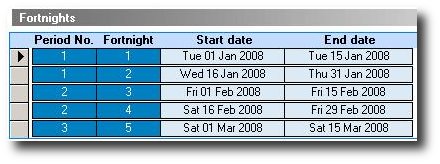
When finished, Sicorax Payroll displays the weeks and fortnights as per below screen:
The “weeks” section above displays all the weeks of above months - each months is divided into weeks.
The “fortnights” section above divides the months into groups of “2-weeks”, called Fortnights.
Additional Information
 If changes have been done manually in the payroll calendar, Sicorax Payroll needs to recalculate the weeks and fortnights (optional). This is done by clicking on the “Update Weeks” button.
 The “Fortnights” section is used mainly when we are dealing with fortnight overtimes calculation. So, changes made in the payroll calendar will necessitate the recalculation of fortnights.
 When changing dates in the payroll calendar, the Start and End dates must not overlap


