You are here: SKB Home » HRMS Payroll » hrmsprocguide » Annual Leave Refund/Bank Annual Leave
Table of Contents
Annual Leave Refund/Bank Annual Leave
*conditions apply
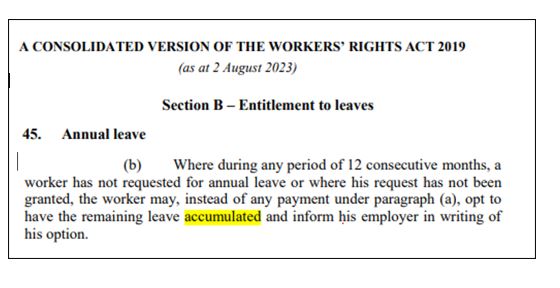
With reference to the below published information in the WRA, you will find further below:
- How to create and configure the new leave Bank Annual Leave
- How to assign the Bank Annual Leave to the Annual Leave
- How to assign the Bank Annual Leave to the Worker's leave group
- How to activate the flag Leave Refund/Bank Annual Leave
- How to use the Home Page Alert in the Annual Leave Refund/Bank Annual Leave process
- How to perform the “Annual Leave Refund/Bank Annual Leave”
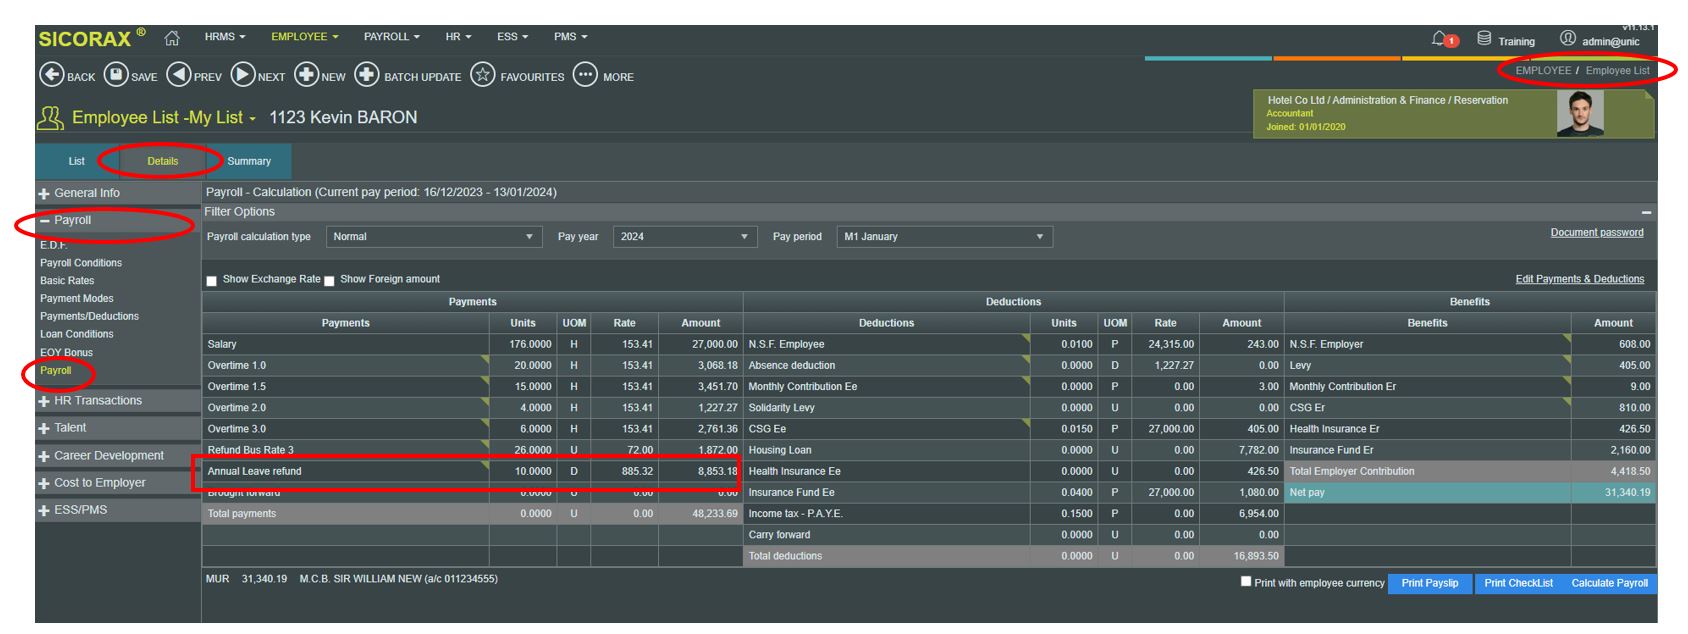
- How to view the Annual leave refund amount
- Illustrations of anomalies which might arise during the Leave Refund/Bank Annual Leave process and their solutions.
STEP 1: Create and configure the new leave "Bank Annual Leave"
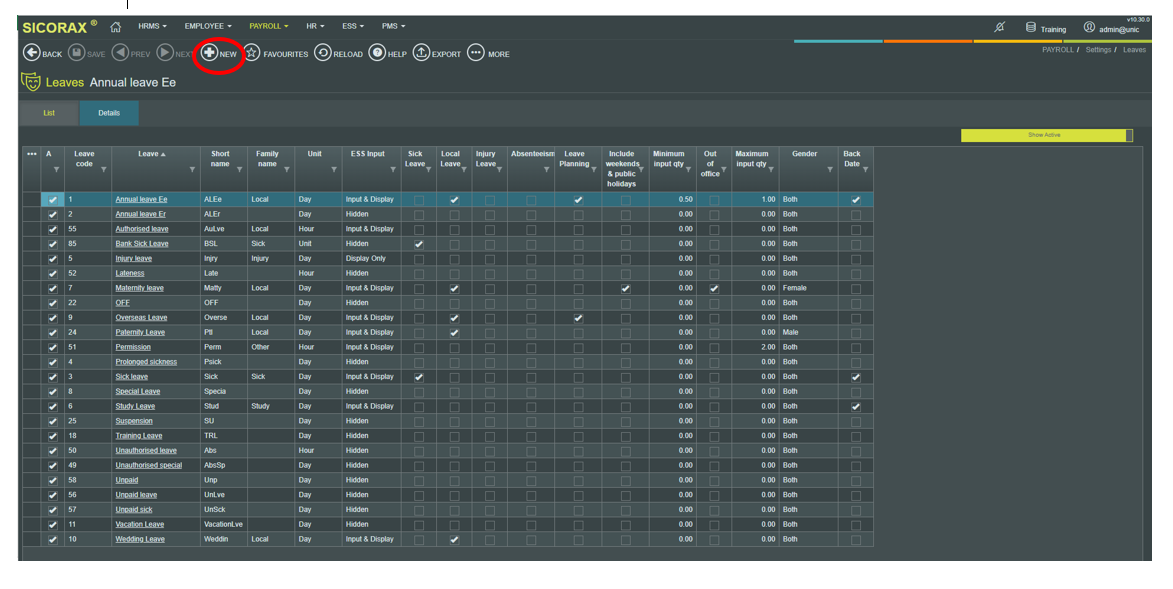
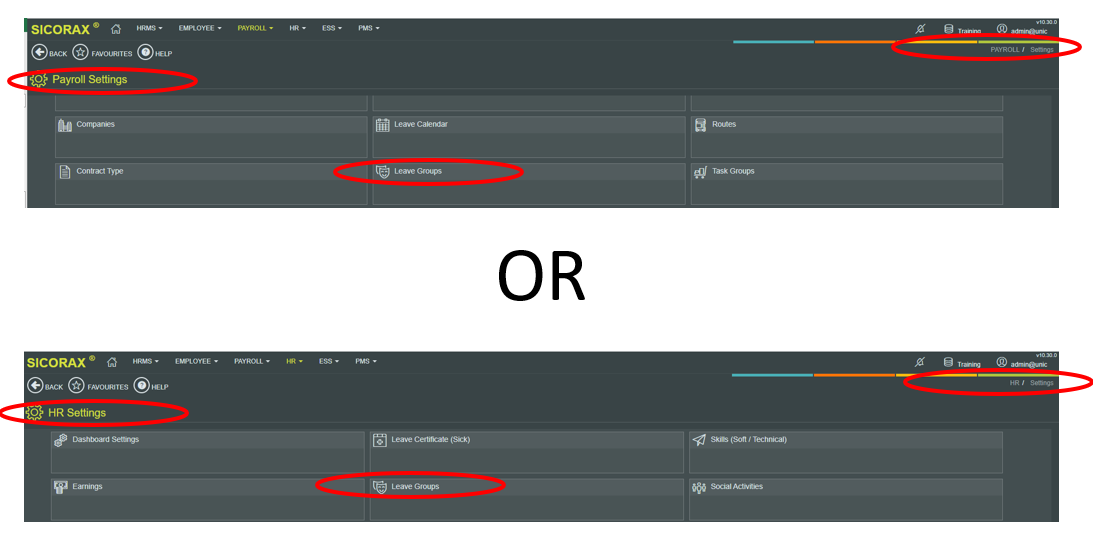
- Step 1: Go Payroll or HR
- Step 2: Settings
- Step 3: Leaves
- Step 4: Click New
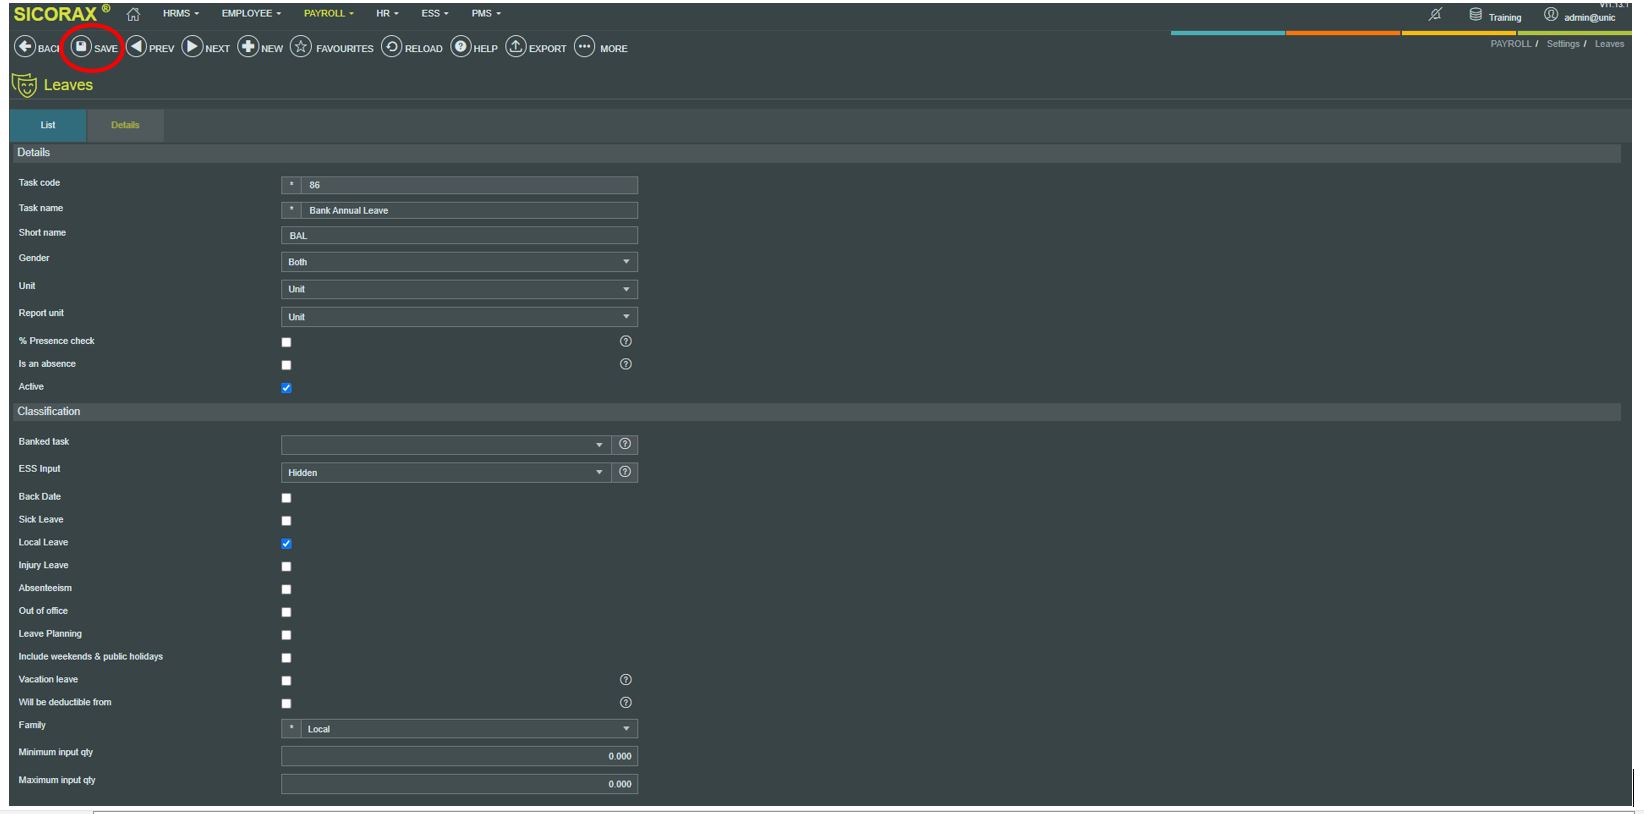
- Step 5: Insert the new leave details as shown above and click Save
- (If you maintain leave in hours, choose “Hour” for the fields Hour and Report Unit as shown above)
- (If you have ESS, you may want to choose between Hidden (leave does not appear on ESS), Input & Display (Leave appear on ESS and is available for employee leave request), Display only (Leave only appear on ESS and not available for employee leave request) as shown above)
- Step 6: Click Save
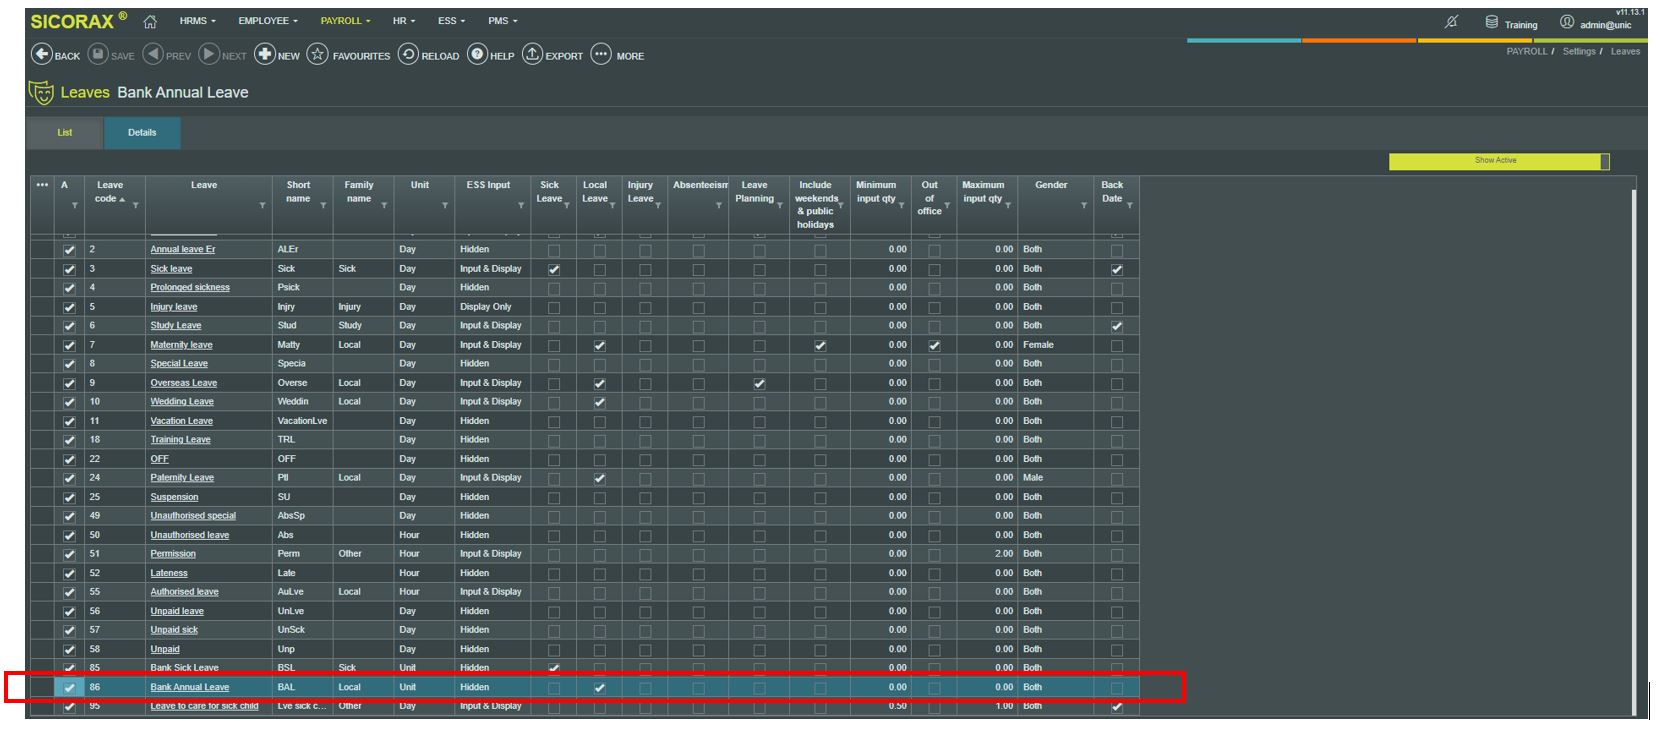
The below illustration displays the new leave in the leaves list
STEP 2: Assign "Bank Annual Leave" to Annual Leave
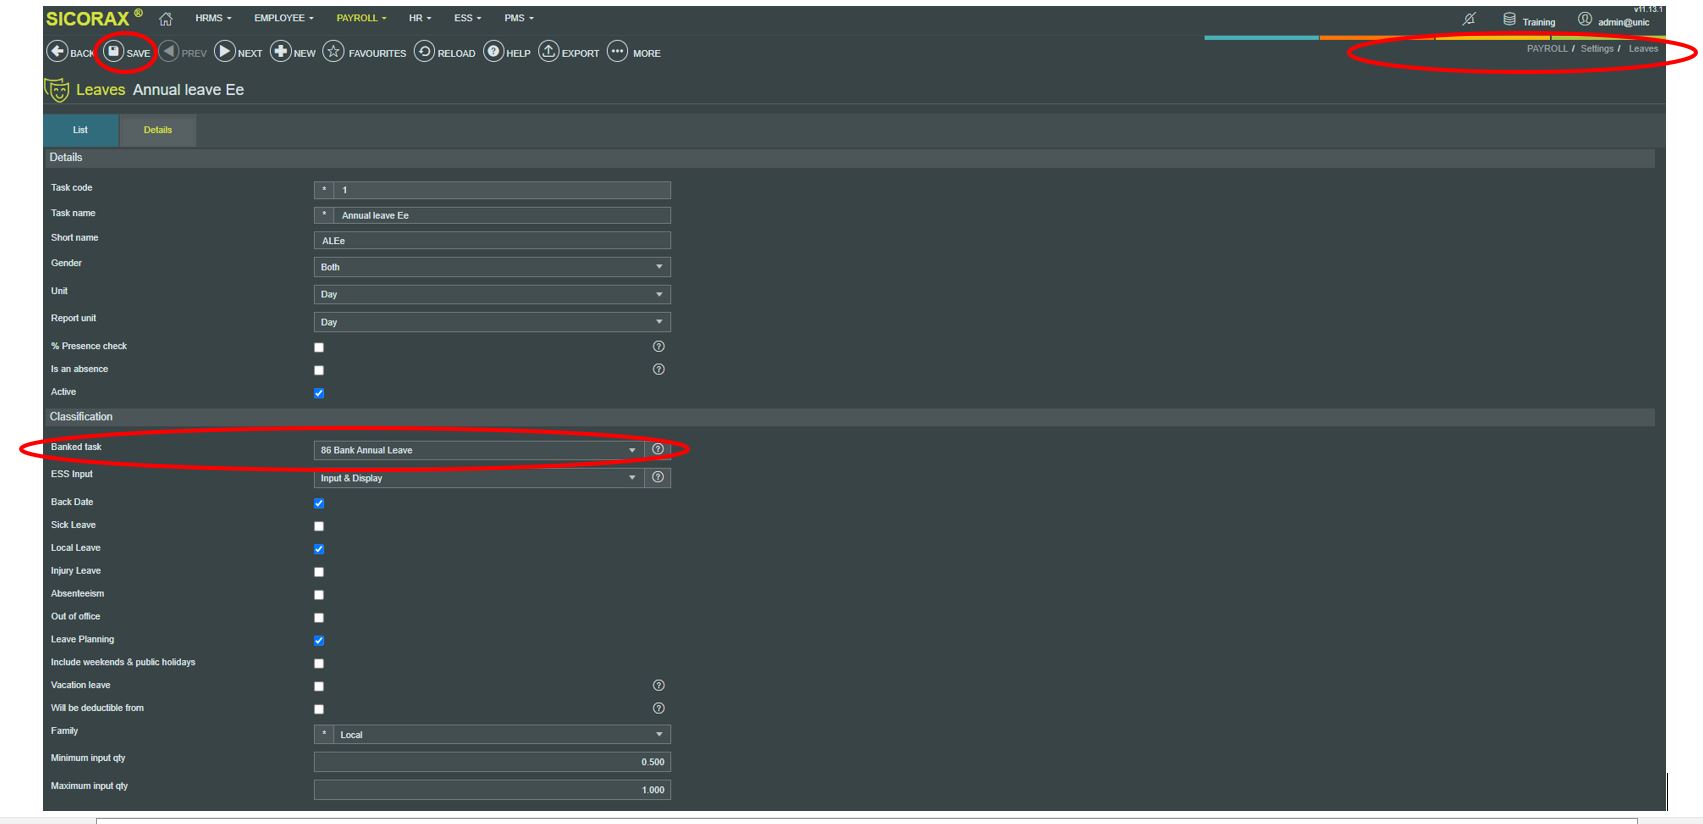
The below illustration shows how to assign the Banked Task for Annual Leave
- Step 7: Go to Payroll/Settings/Leave
- Step 8: Select Annual Leave
- Step 9: Choose the Banked Task from the list
- Step 10: Click Save
Step 3: Assign the Bank Annual Leave to the Worker's leave group
- Step 1: Go to Payroll or HR
- Step 2: Settings
- Step 3: Leave Groups
- Step 4: Select the worker's leave group (on your database, select the leave group which represents the worker's leave group)
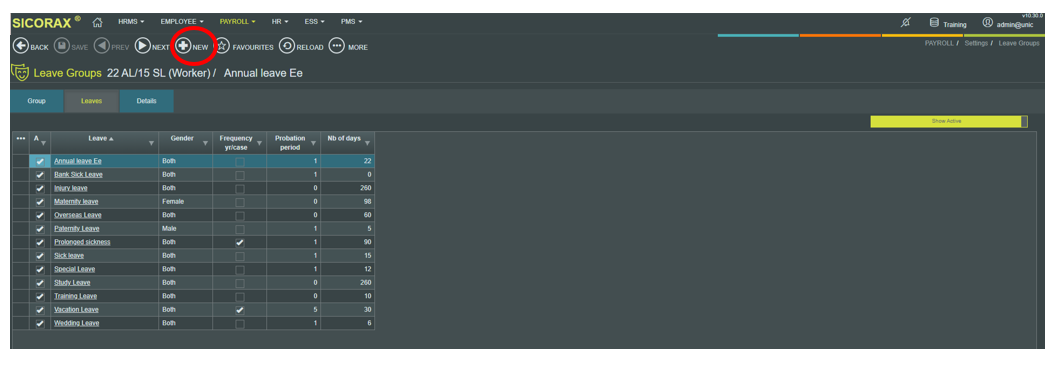
- Step 5: Click New
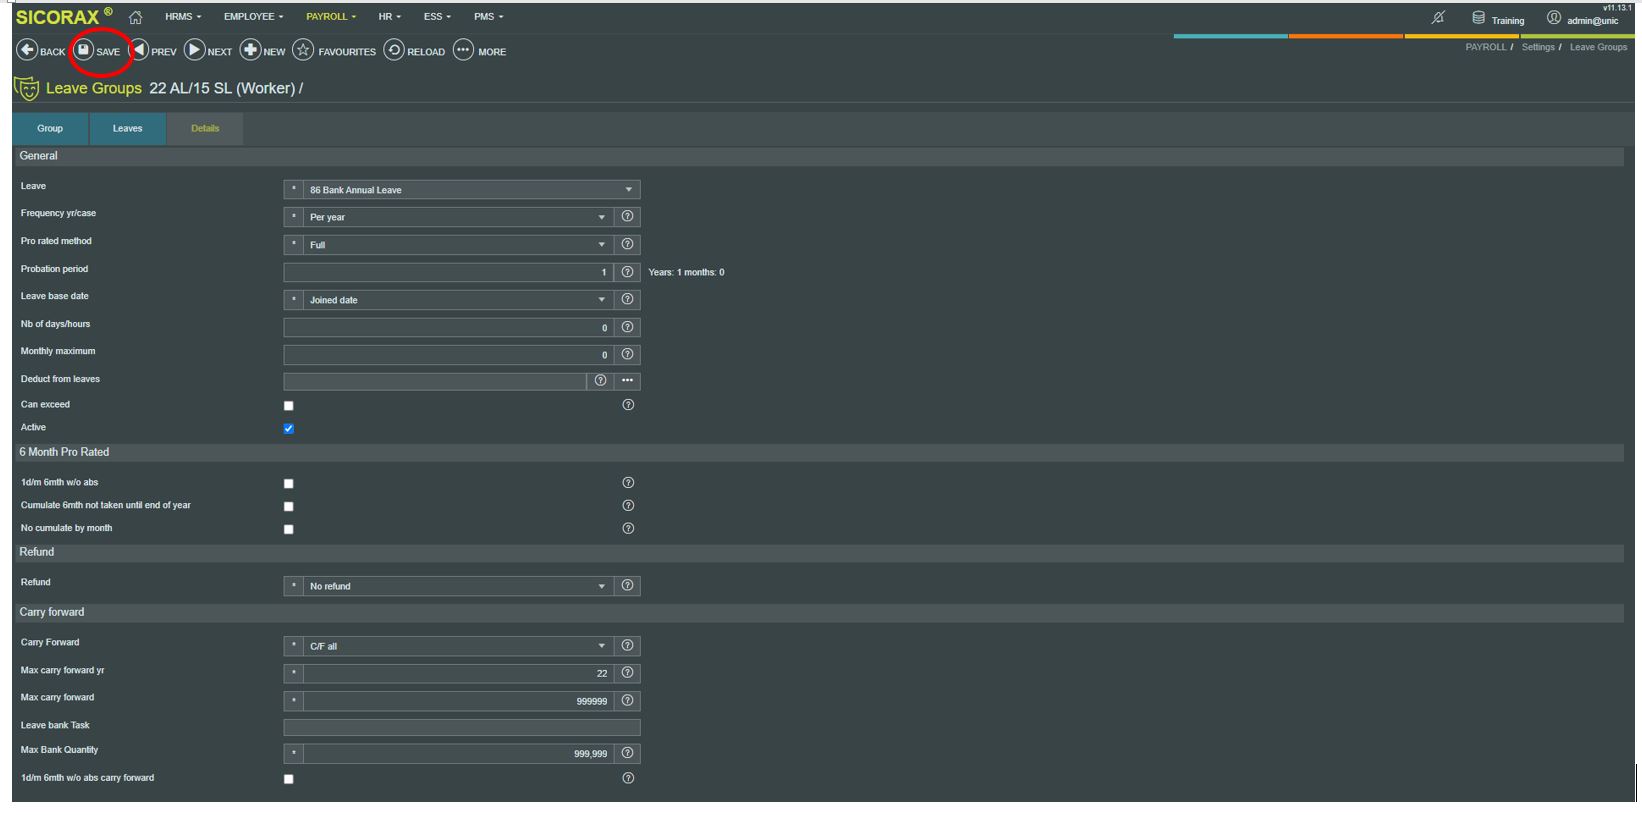
- Step 6: Insert the leave details for Bank Annual leave in the worker's leave group as shown above and click Save
The below illustration shows the Bank Annual leave in the worker leave groups list
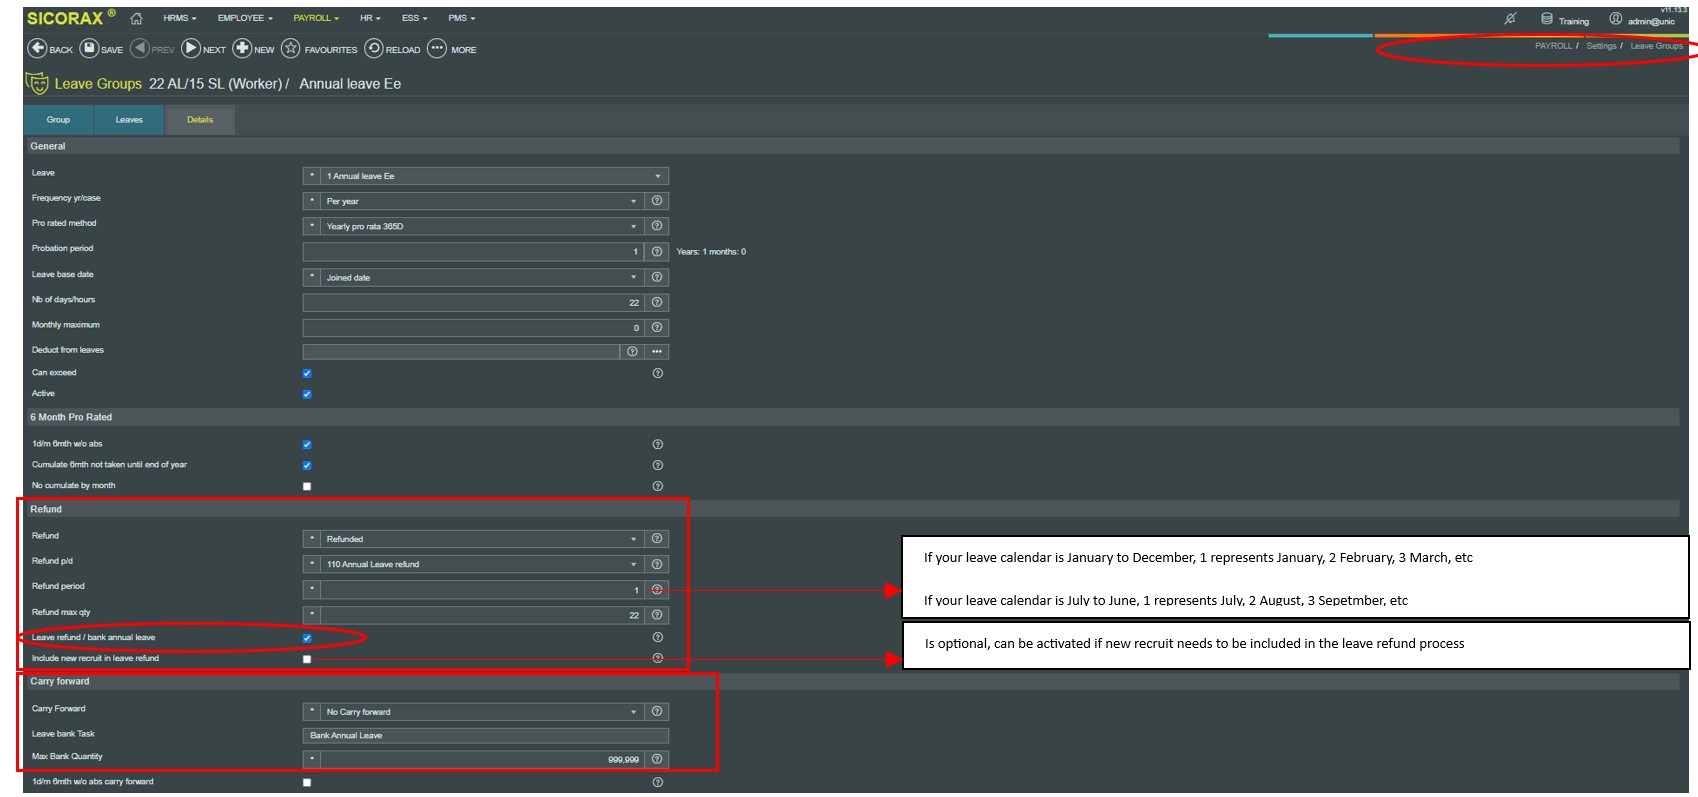
STEP 4: Activate the flag leave refund/Bank annual leave
- Step 1: Go to Payroll or HR
- Step 2: Settings
- Step 3: Leave Groups
- Step 4: Select the worker's leave group (on your database, select the leave group which represents the worker's leave group)
* Step 5: Select Annual Leave from the list
* Step 6: Configure the Refund and Carry Forward sections as shown above
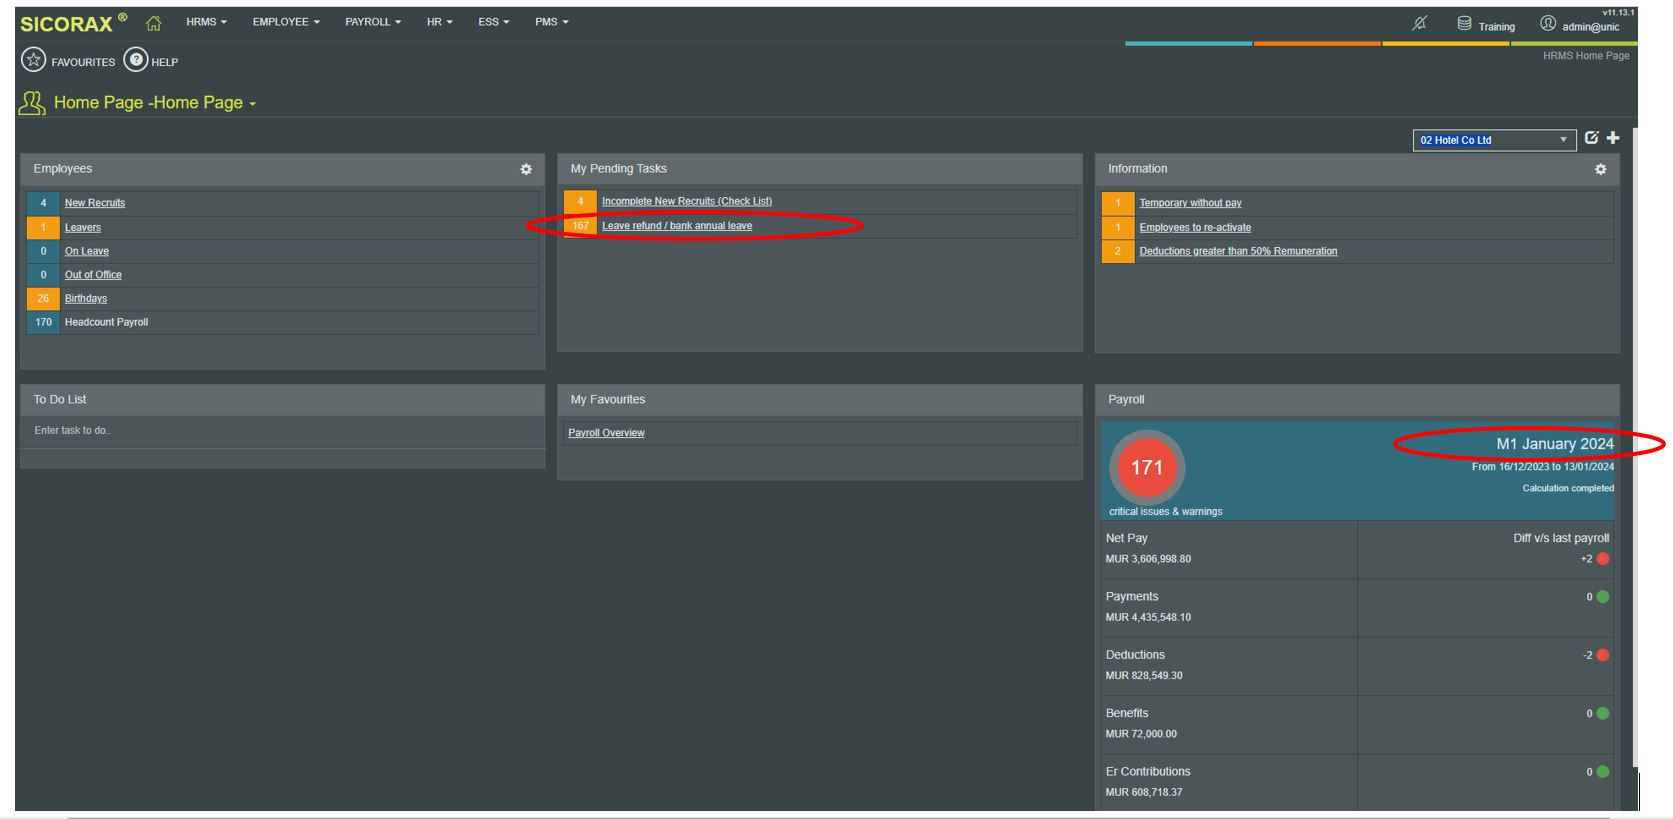
STEP 5: Home Page Alert
The below illustration notifies for pending leave refund/bank annual leave records for January 2024
- Step 1: Click the alert
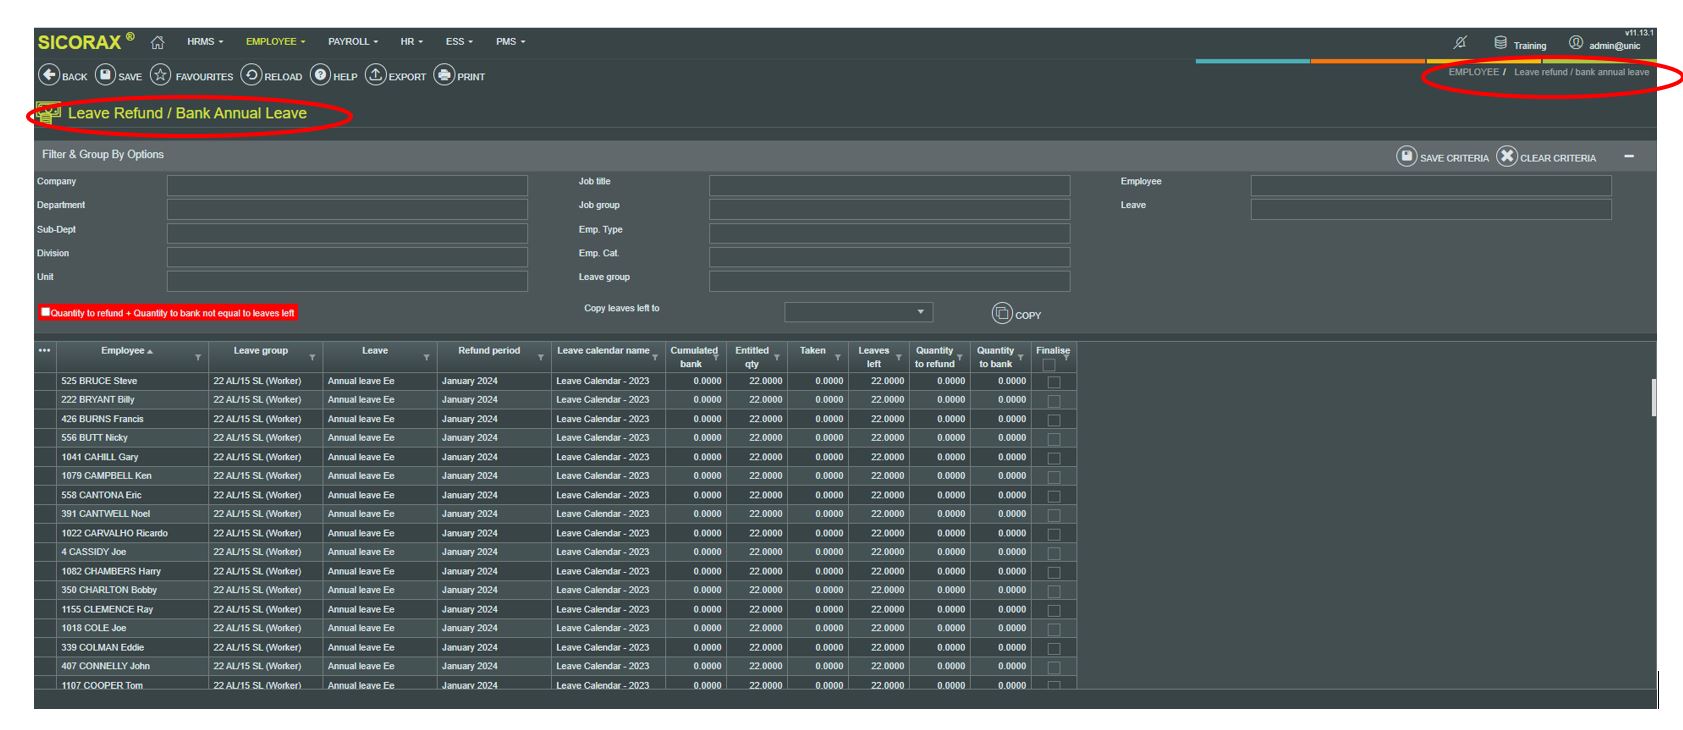
The list of pending leave refund/bank annual leave records is displayed as shown below
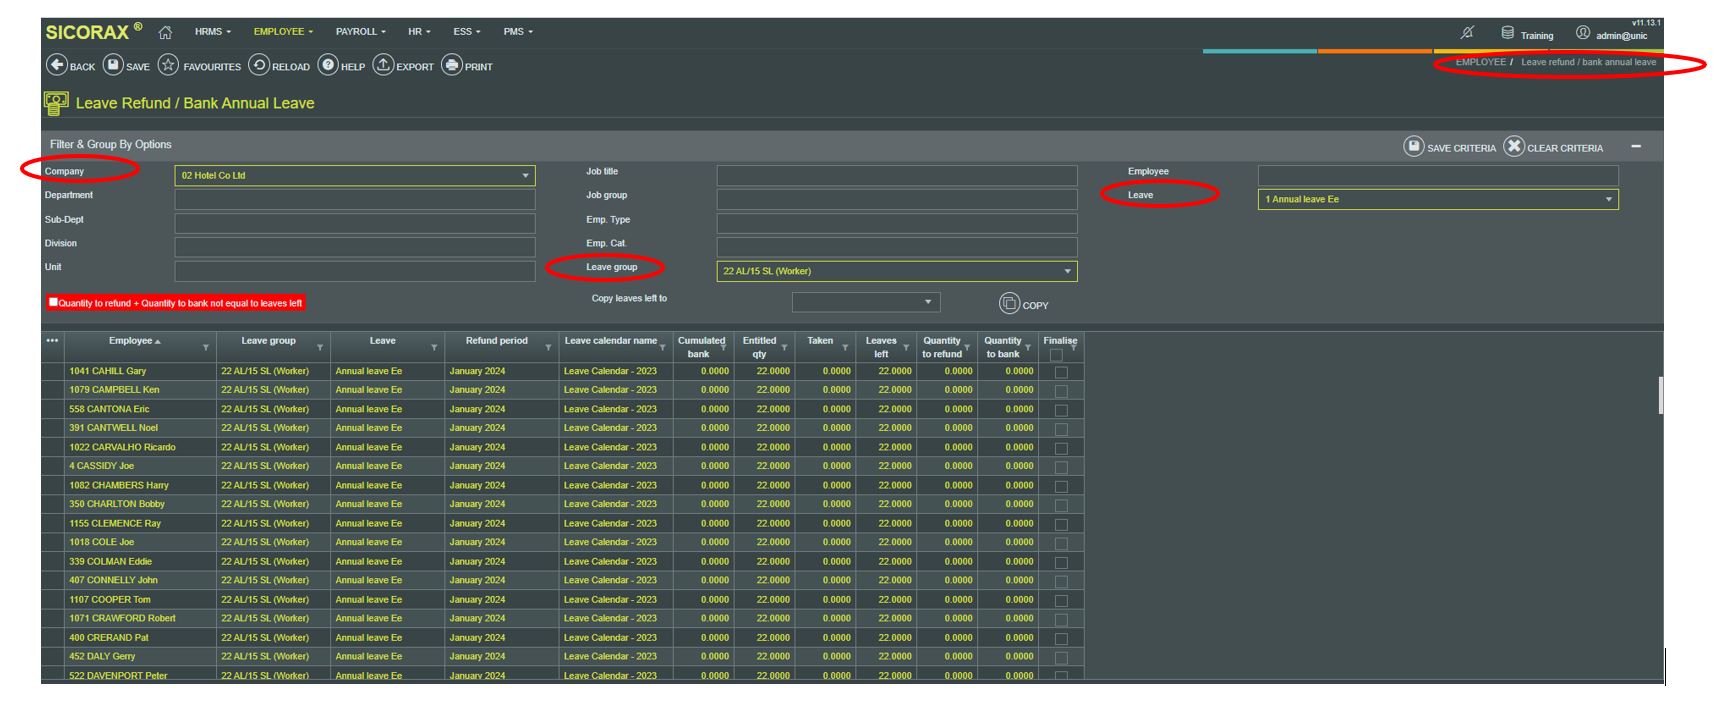
Step 6: Perform the leave refund/Bank annual leave process
- Either by inserting Quantity to Refund or Quantity to Bank or
- By using the Copy from leaves Left facility
Both options requires choosing the necessary criteria
Insert Quantity to refund or Quantity to bank
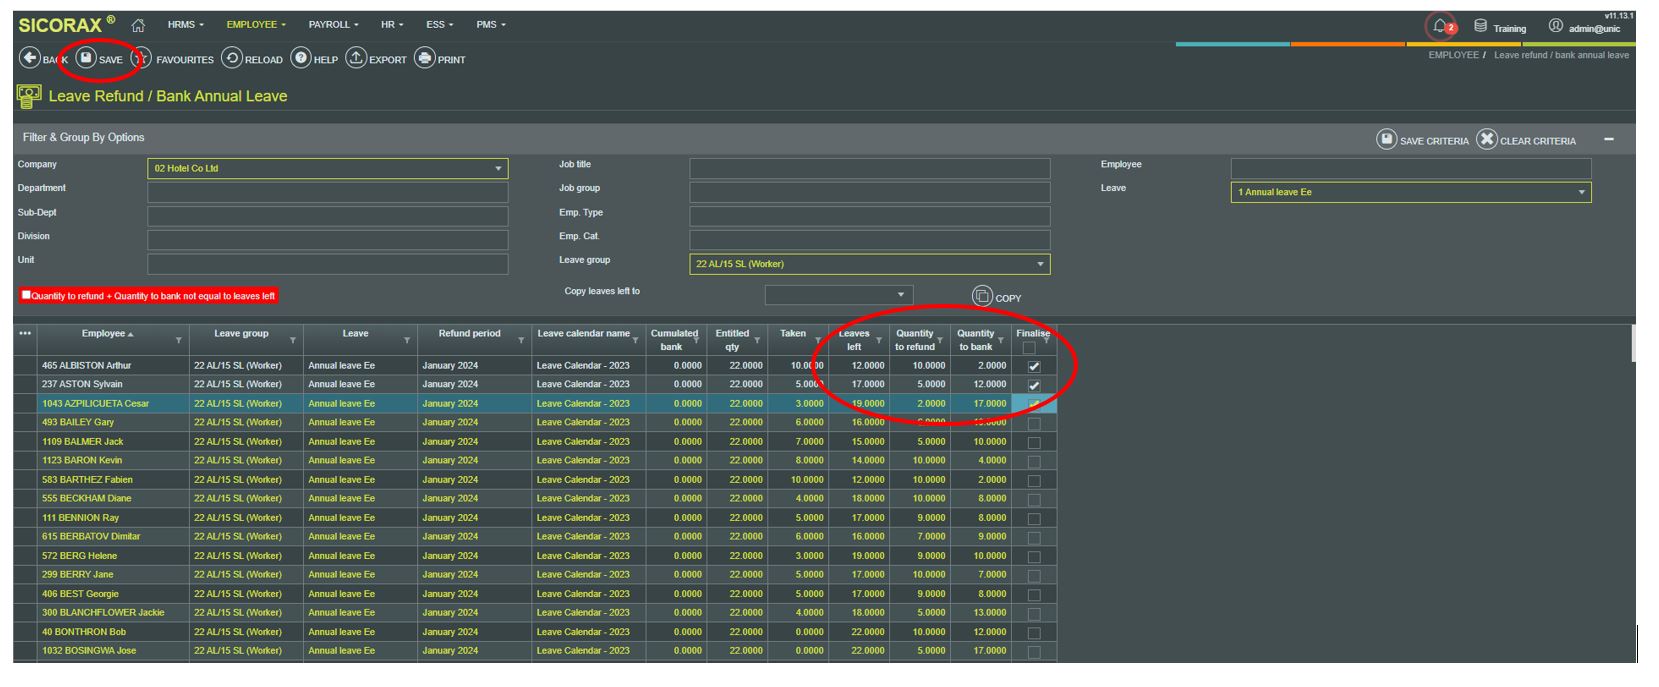
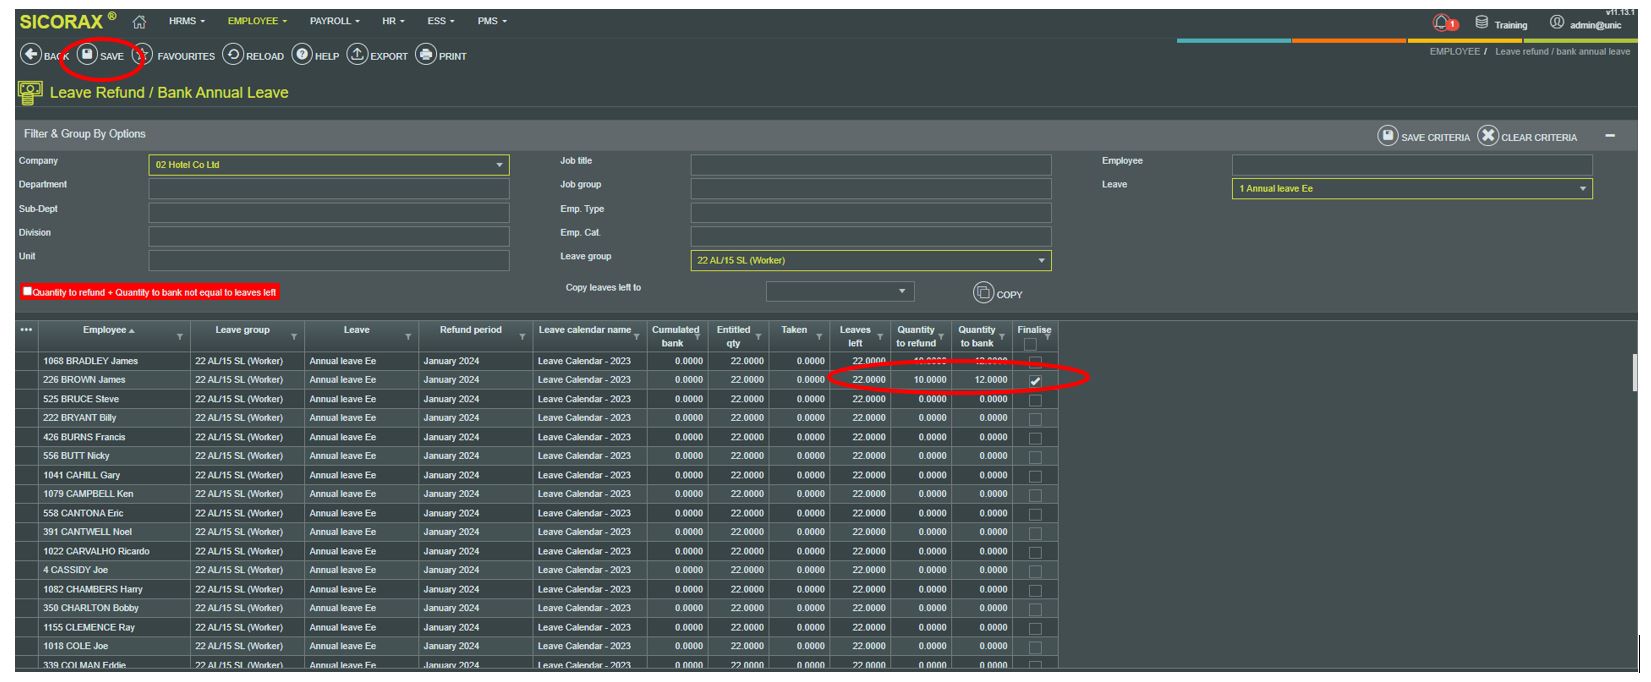
- Step 3: In the grid, for each employee, based on the Leaves Left, insert either the Quantity to refund or Quantity to bank (while inserting the Quantity to refund, the system automatically completes the Quantity to bank and vice versa)
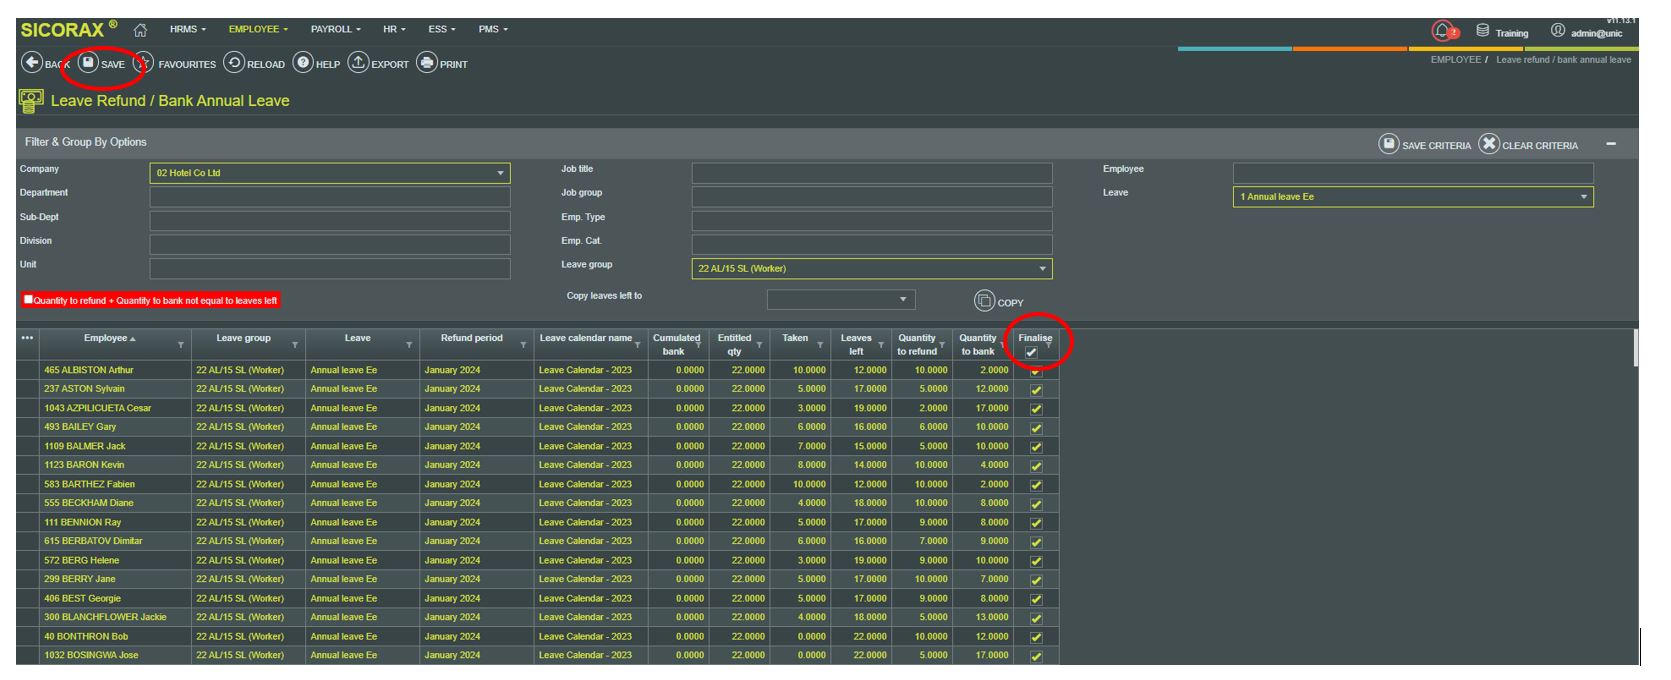
- Step 4: Activate Finalise Finalised is only successful if Quantity to Refund & Quantity to Bank equals Leaves Left
- Step 5: Click Save
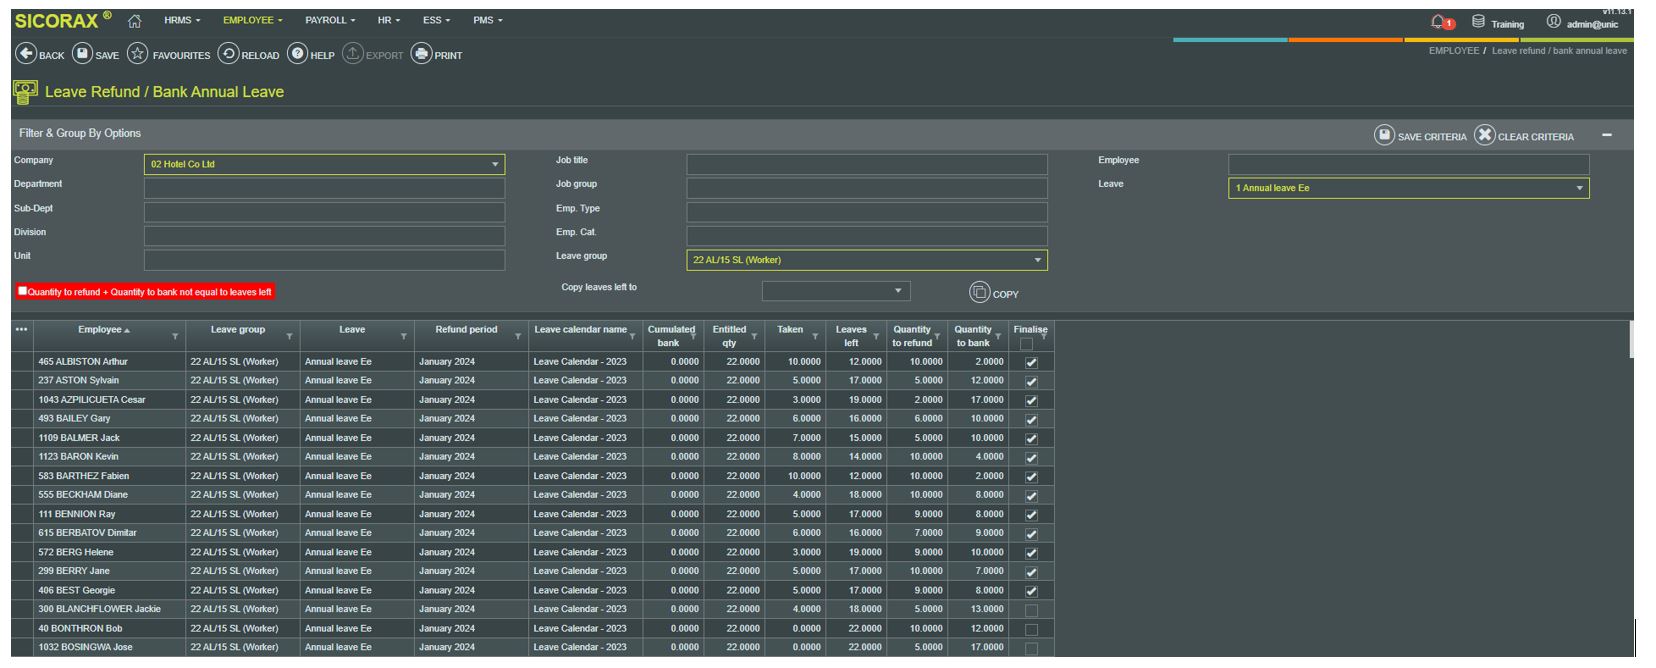
Note: Finalise can be activated for all employees at one go after completing the insertion of the Quantity to refund or Quantity to bank as shown below
Copy leaves left facility
Use this facility to copy leaves left to Quantity to Refund or Quantity to Bank. An illustration is shown below
- Step 1: Choose from the drop-down list Quantity to Refund or Quantity to Bank
- Step 2: Click the Copy button
The below illustration shows Leaves left quantity has been copied to Quantity to Bank
- Step 3: Activate Finalise
- Step 4: Click Save
How to view the Annual leave refund amount
Illustrations of anomalies which might arise during the Leave Refund/Bank Annual Leave process and their solutions
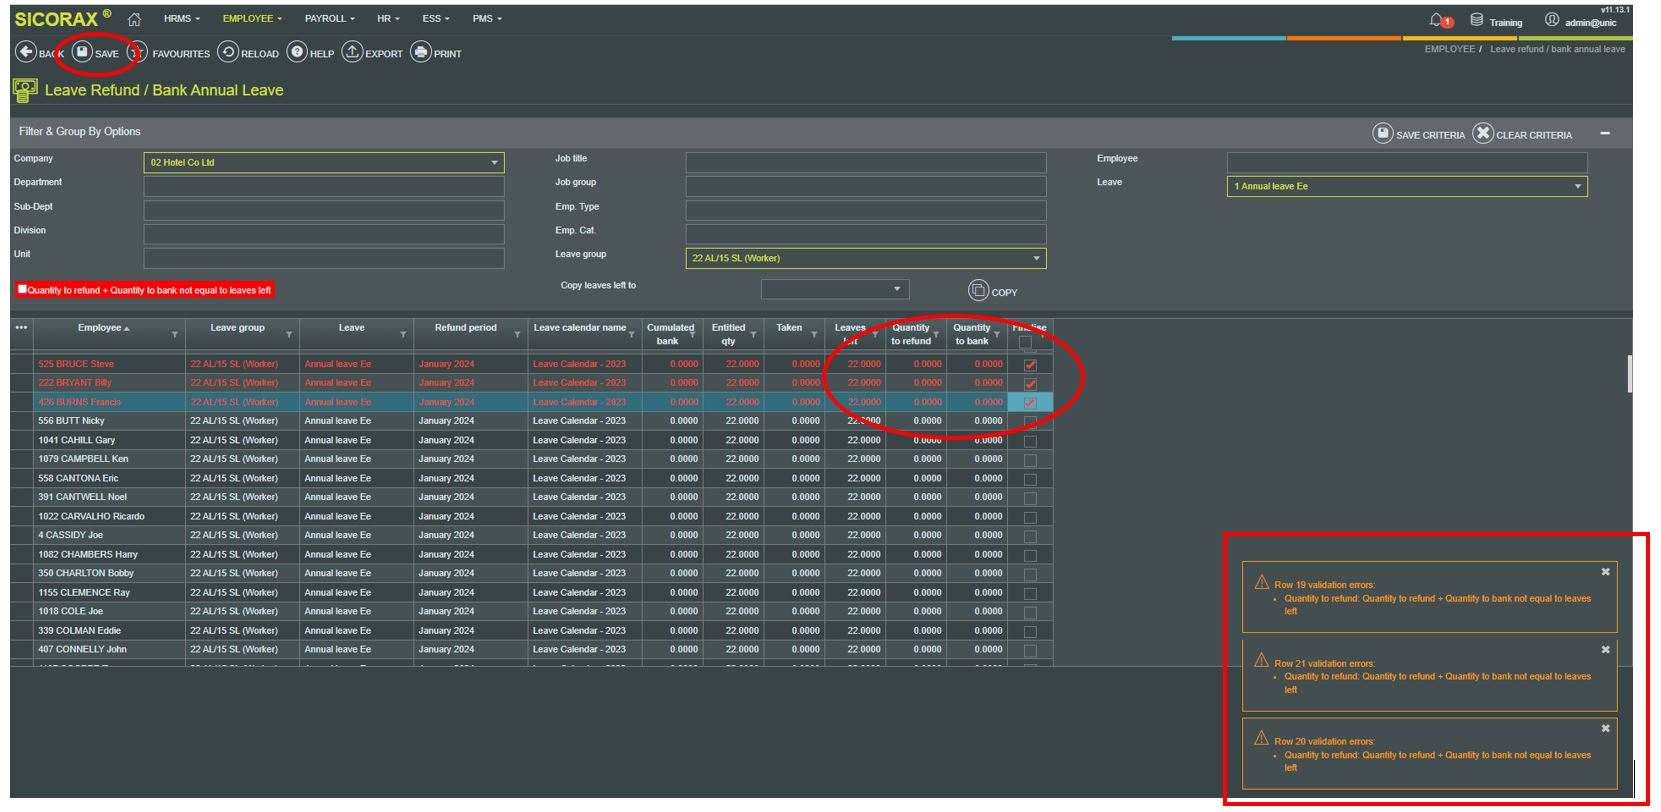
Finalising the leave refund/Bank annual leave process without completing the Quantity to Refund or Quantity to Bank
Note: Finalise must be activated after completing Quantity to refund or Quantity to bank else, anomalies will arise as shown below
Inserting additional annual leave after having finalised the leave refund/Bank annual leave
The below illustration shows the leave refund/Bank annual leave which has been successfully finalised for an employee
The below illustrations shows the system automatically highlights the employee's name and deactivates the Finalise flag in case any additional annual leave has been inserted after the leave refund/Bank annual leave has been finalised.
Proceed with the necessary correction either for Quantity to Refund or Quantity to Bank, Finalise and Save
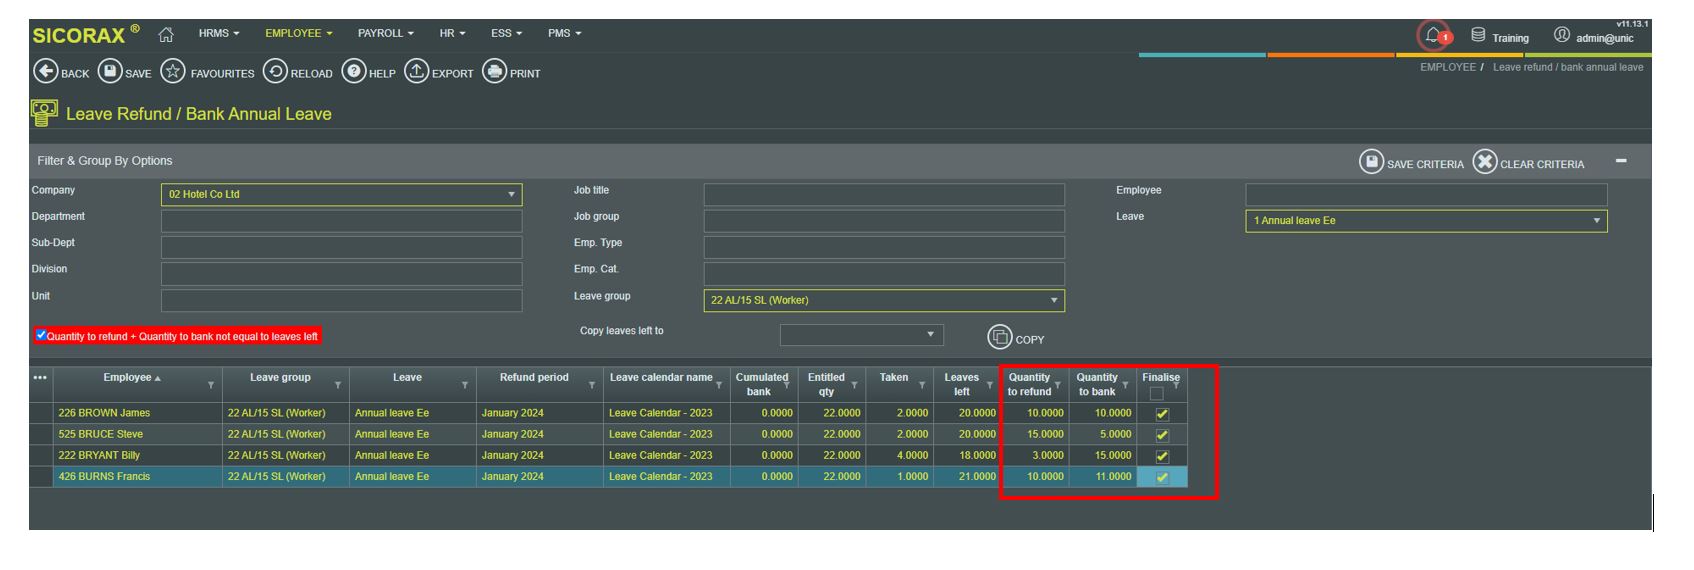
Quantity to refund + Quantity to bank not equal to leaves left
To retrieve a list of discrepancies where Quantity to refund + Quantity to bank not equal to leaves left, activate the flag as shown below and proceed with the necessary corrections.
Proceed with the necessary corrections for Quantity to Refund or Quantity to Bank, Finalise and Save
Payroll calculation showing critical anomaly for pending leave refund/Bank annual leave
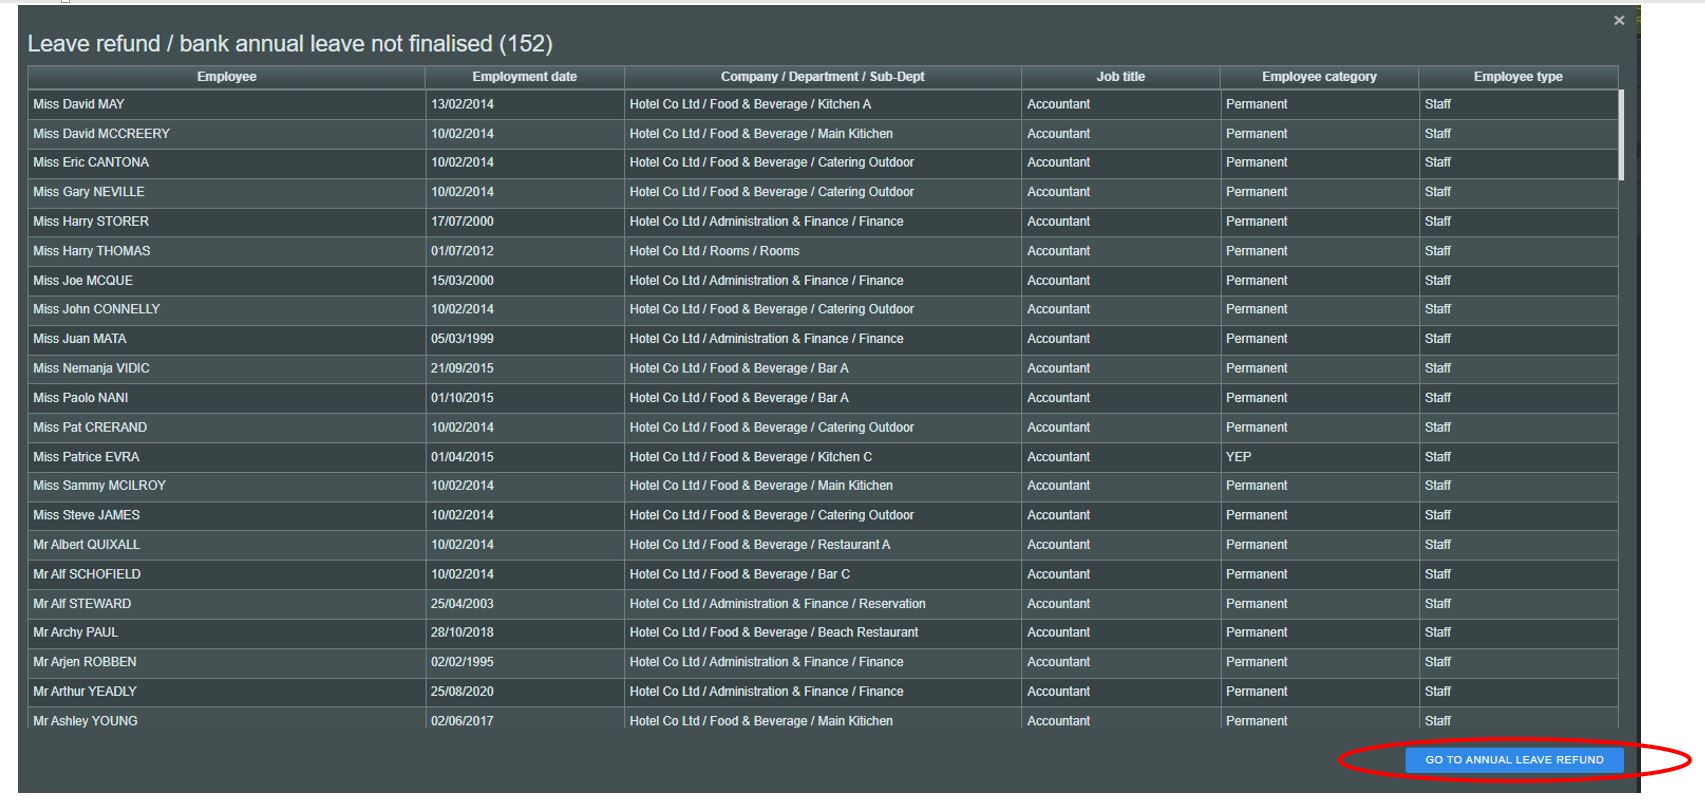
During the payroll calculation process, if there are unfinalised leave refund/Bank annual leave records, the system will automatically detect such critical anomalies
- Click the anomaly alert
- Click Go to Annual Leave Refund
- Perform the necessary input for Quantity to Refund or Quantity to Bank, Finalise and Save
