You are here: SKB Home » Sicorax Employee Self Service » HR Admin-Manager Guide » Application of Leaves
Application of Leaves
Step 1:
To apply for any leaves, click on Applications and the screen will appear as below.
By default,the “Apply for leave (self)” is loaded [Fig1]
Step 2:
Click and select the leave type from the drop down list
Example:
Assume an employee is applying for 2 local leaves; he/she do not need to insert any figures in the Qty field.[Fig2]
But if the leaves apply for is less than 1 day, it’s only then you change the Qty. e.g. to 0.5.
See the following screen for more details.
Once the leave type has been selected, proceed with the following steps:
Step 3:
Click on the dates for which leaves are to be applied for (26th & 27th May)
If the date is wrongly selected, click on the Cancel button to cancel the selection
Step 4:
Click on Confirm button
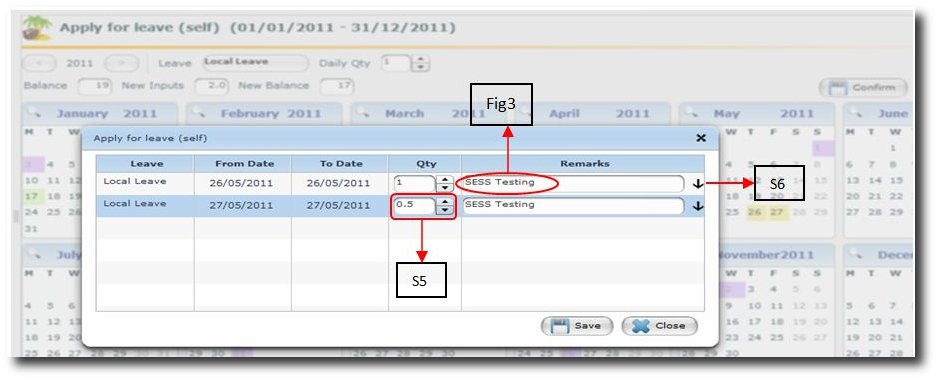
The leaves details are displayed for validation, as shown below:
Step 5:
Possibility to change the quantity if leave to be taken is less than 1 using the arrow keys
Step 6:
Add Remarks if any in the first field and Click on the down arrow to apply the same remark to all the successors.
Click on the Save button to confirm the leaves or on the Close button to cancel the applications
NB: An email is automatically sent to the leave supervisor or HR administrator, whoever has been assigned to approve leaves within the company.

