You are here: SKB Home » SEAM » User Guide » SEAM Process » Product » Posts
Posts
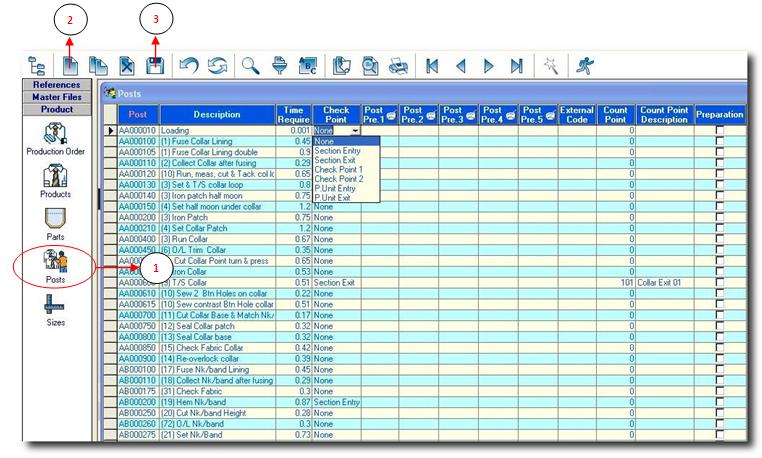
- Step 1: Click on Posts.
- Step 2: Click on new button, a new line will be added.
- Post: Allocate a code to the Post by starting with the letter you allocated as Post Prefix for that particular part.
- Description: Describe the post in a comprehensive way, bearing in mind that operators will read these descriptions on printed barcode tickets later.
- Time Required: Enter the time required to perform that operation per piece and in minutes or fraction of.
- Check Point: Select the relevant check point value by clicking on the arrow and select from the dropdown list (you have seven possible values).
If a post is assigned as check point, SEAM will inform you of the number of pieces which has been through that particular post every hour, and for each of your orders containing that post. This can be very useful for monitoring urgent orders. Posts can be:
- Production Unit entry
- Section Entry
- Checkpoint 1 (User defined, the label for this is described in Sites)
- Checkpoint 2 (User defined, the label for this is described in Sites)
- Section Exit
- Production Unit exit
- Post Predecessor: Enter the Pre-posts data. Pre-posts are operations that need to be done before doing the current operation you are creating. We allow you to manage Pre-posts up to 5 levels.
- Step 3: Click on the save button to save all your entries.
