You are here: SKB Home » PMS » Administrator Guide » Jobs
Table of Contents
Jobs
Job Titles
Add Job Titles
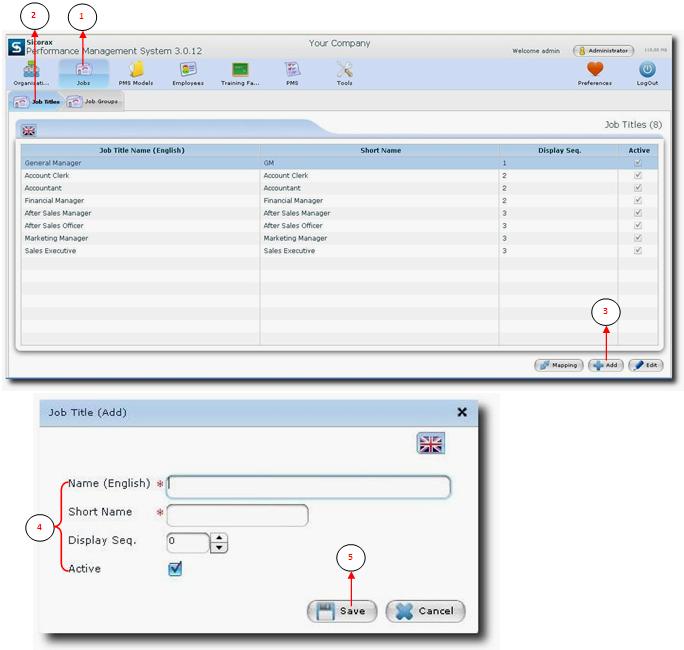
- Step 1: Click on Jobs.
- Step 2: Select Job Titles tab
- Step 3: Click on Add button
- Step 4:
- Name: Enter the Job Title Name.
- Short Name: Enter a short name for the Job Title.
- Display Seq: Use the up and down arrow to select sequence.
- Active: The flag is set active automatically.
- Step 5: Click on Save button to save all your entries.
Nb: The mandatory fields are indicated by the * symbol.
Edit Job Title
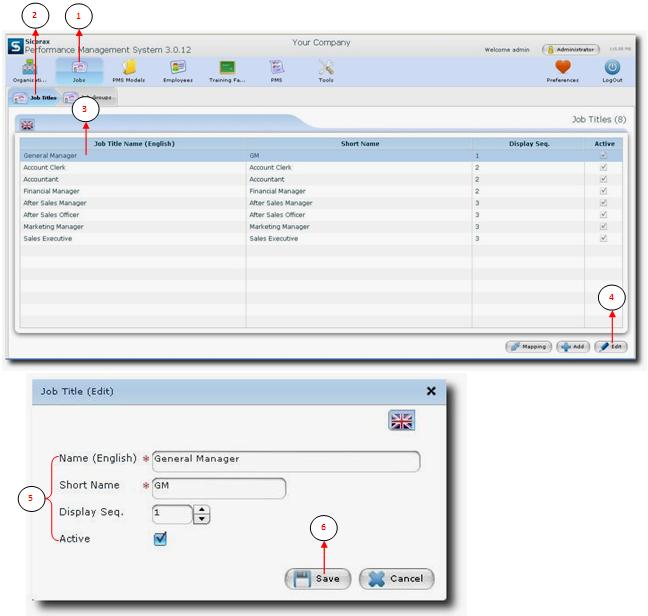
- Step 1: Click on Jobs.
- Step 2: Select Job Titles tab.
- Step 3: Select the Job Title Name you want to edit.
- Step 4: Click on Edit button.
- Step 5: Make necessary changes.
- Step 6: Click on Save button to save all changes.
Job Title Mapping
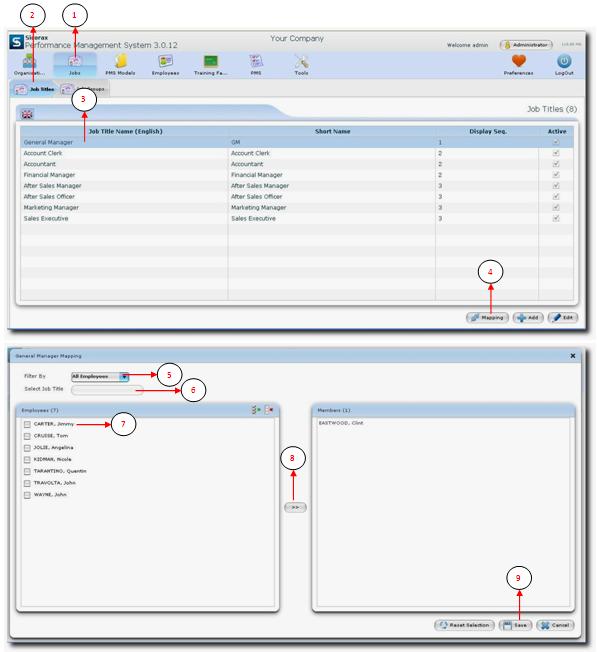
- Step 1: Click on Jobs.
- Step 2: Select Job Titles tab
- Step 3: Select the Job Title Name.
- Step 4: Click on Mapping button
- Step 5: Click on the arrow to select the Filter type from the drop down list.
- Step 6: Click on the arrow to select the Job Title for mapping.
- Step 7: Select the employee/employees.
- Step 8: Click on the arrow to proceed with the mapping.
- Step 9: Click on the Save button to save all changes.
Job Groups
Job group is not a mandatory data. Job groups are usually defined and attributed to employees only for reporting purposes. Instead of analyzing graphs by job title, the supervisor can also analyze by job group.
Add Job Group
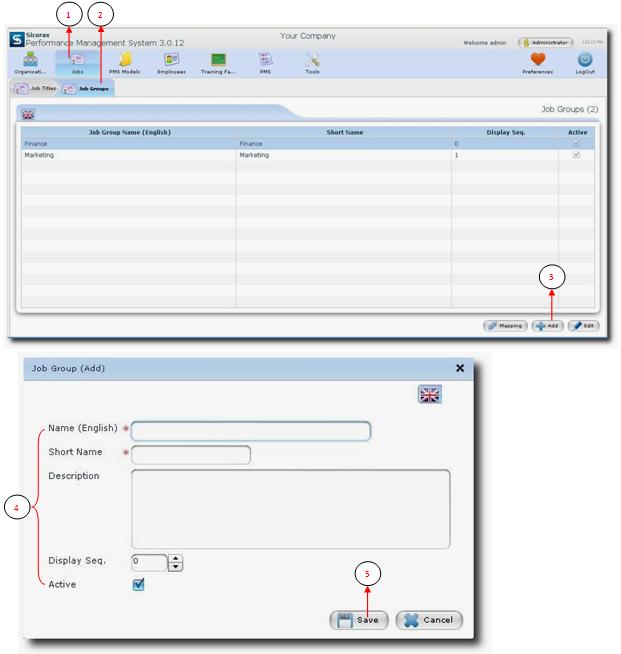
- Step 1: Click on Jobs.
- Step 2: Select Job Groups tab
- Step 3: Click on Add button
- Step 4:
- Name: Enter the Job Group Name.
- Short Name: Enter a short name for the Job Group.
- Description: Enter a short note to describe the job group.
- Display Seq: Use the up and down arrow to select sequence.
- Active: The flag is set active automatically.
- Step 5: Click on Save button to save all your entries.
Nb: The mandatory fields are indicated by the * symbol.
Edit Job Group
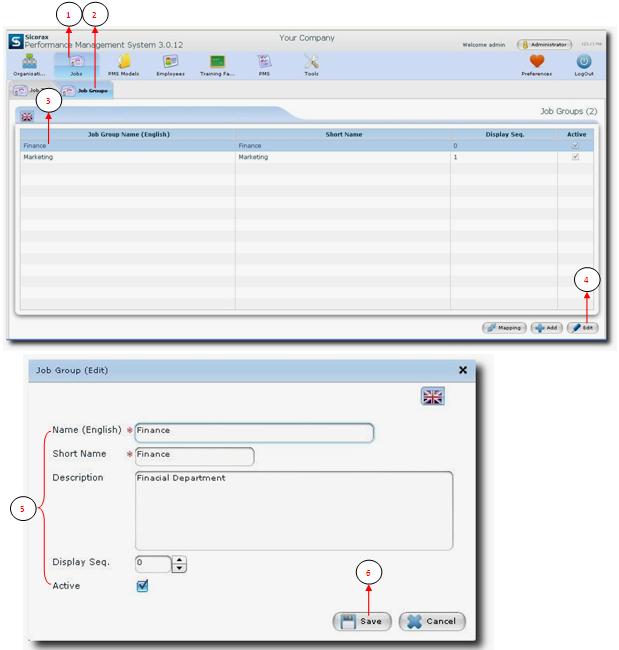
- Step 1: Click on Jobs.
- Step 2: Select Job Groups tab.
- Step 3: Select the Job Group Name you want to edit.
- Step 4: Click on Edit button.
- Step 5: Make necessary changes.
- Step 6: Click on Save button to save all changes.
Job Group Mapping
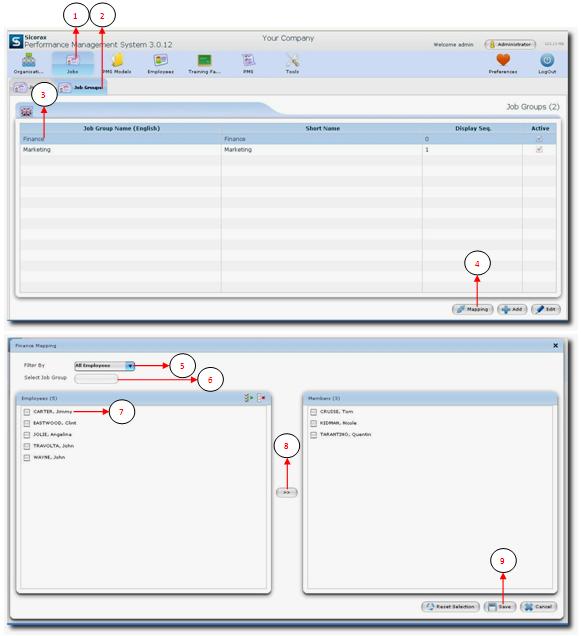
- Step 1: Click on Jobs.
- Step 2: Select Job Groups tab
- Step 3: Select the Job Group Name.
- Step 4: Click on Mapping button
- Step 5: Click on the arrow to select the Filter type from the drop down list.
- Step 6: Click on the arrow to select the Job Group for mapping.
- Step 7: Select the employee/employees.
- Step 8: Click on the arrow to proceed with the mapping.
- Step 9: Click on the Save button to save all changes.
