You are here: SKB Home » HRMS Payroll » hrmsprocguide » Verification before printing SOE and exporting ROE
Verification before printing SOE and exporting ROE
Note: The below illustrations are related to fiscal year 2023 (June 2022-July 2023) however, for fiscal year 2025 (June 2024-July 2025), use the same steps by simply replacing 2024 with 2025 where applicable as shown below
Before printing the Statement of Emoluments and exporting the Return of Employees (MNS/MRA Yearly Returns), you may want to verify some information.
Also, you may want to check figures appearing on the SOE through payroll historic figures using the statistics module. Finally, you may want to view PAYE figures for the fiscal period through the Income Tax Reconciliation Statement. To do so, see further below.
How to verify Company details and assign payroll items to SOE and ROE groups
To do so, use the following steps:
How to verify Company details
- Step 1: Go to Payroll
- Step 2: Click Settings
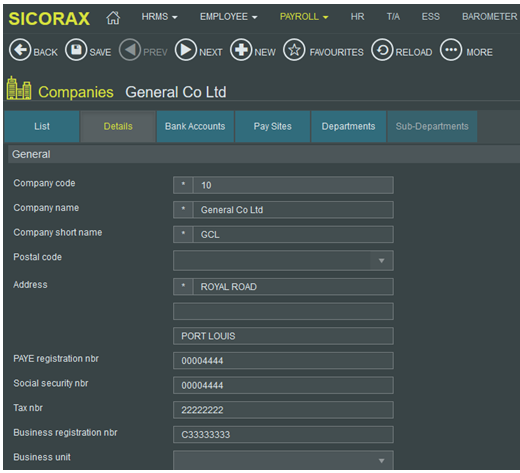
- Step 3: Click Companies
- Step 4: Select the company
- Step 5: Verify the PAYE nbr, Social Security nbr, Tax nbr, BRN
How to verify the mapping of the SOE and ROE groups for the payroll items
- Step 1: Go to Payroll
- Step 2: Click Settings
- Step 3: Click Payments/deductions
MRA Return Column The MRA Return column shows the groups which appear on the Return of Employees (ROE)
- Step 4: Click the MRA Return Column section on the left-hand side of the screen
- Step 5: Click each ROE group to verify the list of payment & deduction which has been assigned to the group
- The below illustration shows the payroll items which have been assigned to the ROE group Salary/Wages/Allowances/Bonus
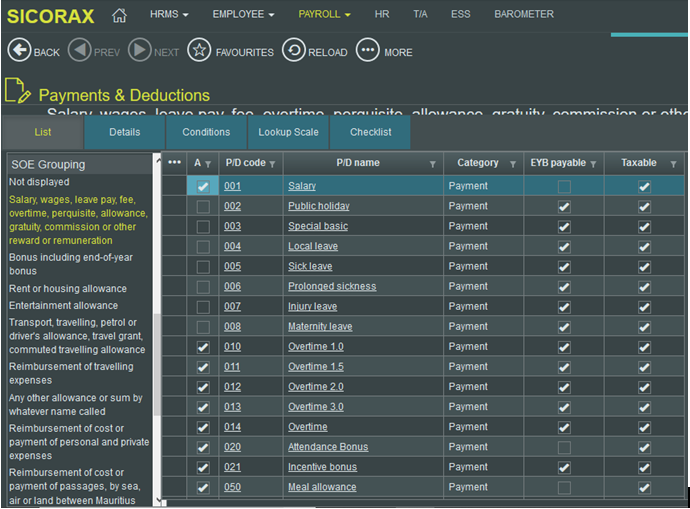
SOE Grouping The SOE Grouping shows the groups which appear on the Statement of Emoluments (SOE)
- Step 4: Click the SOE Grouping section on the left-hand side of the screen
- Step 5: Click each SOE group to verify the list of payment & deduction which has been assigned to the group
- The below illustration shows the payroll items which have been assigned to the SOE group Salary, wages, leave pay, fee, overtime, perquisite, allowance, gratuity, commission or other reward or remuneration
- To view the ROE and SOE group of a payroll item
- Click the payroll item in the list
- Scroll down to the PAYE block
- PAYE return column represents the ROE group
- PAYE SOE row represents the ROE group
Below is an illustration of the PAYE return column (SOE) and PAYE SOE (ROE) groups for the payroll item PAYE:
- If your SOE or ROE grouping needs modification, send an email to hrms@uniconsults.mu with email title “Assistance SOE/ROE column”
- Payroll items should NOT be assigned to Tax(ROE)Column “Exempt Emoluments (MUR)”
How to verify Payroll Historic figures appearing on the SOE using the Statistics Module
Using the Statistics module, the following steps will help you verify the figures of the Statement of Emoluments. By inserting the following criteria you will be able to analyse your payroll data from July to June.
- Step 1: Go to Payroll
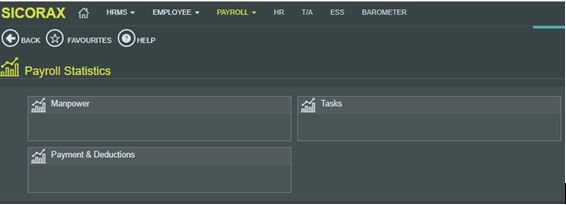
- Step 2: Click Statistics
- Step 3: Click Payments/deductions
- Step 4: Set the necessary selection, filtering and grouping as illustrated below:
- Year choose 2023 activate ON (replace 2023 with 2025)
- Month choose June activate ON
- Payroll Calc Type Select Normal and Mid-December activate ON (It is compulsory to select Mid-December for the End of Year Bonus figures to be considered in the display)
- Company choose The required company (in the illustration company 01 has been chosen) activate ON
- Employee activate ON
- PD Group choose all the 13 SOE groups activate ON
- Pay/Ded choose 001 Salary
- Detailed select
- Last 12 months select
- Show Grand Total select
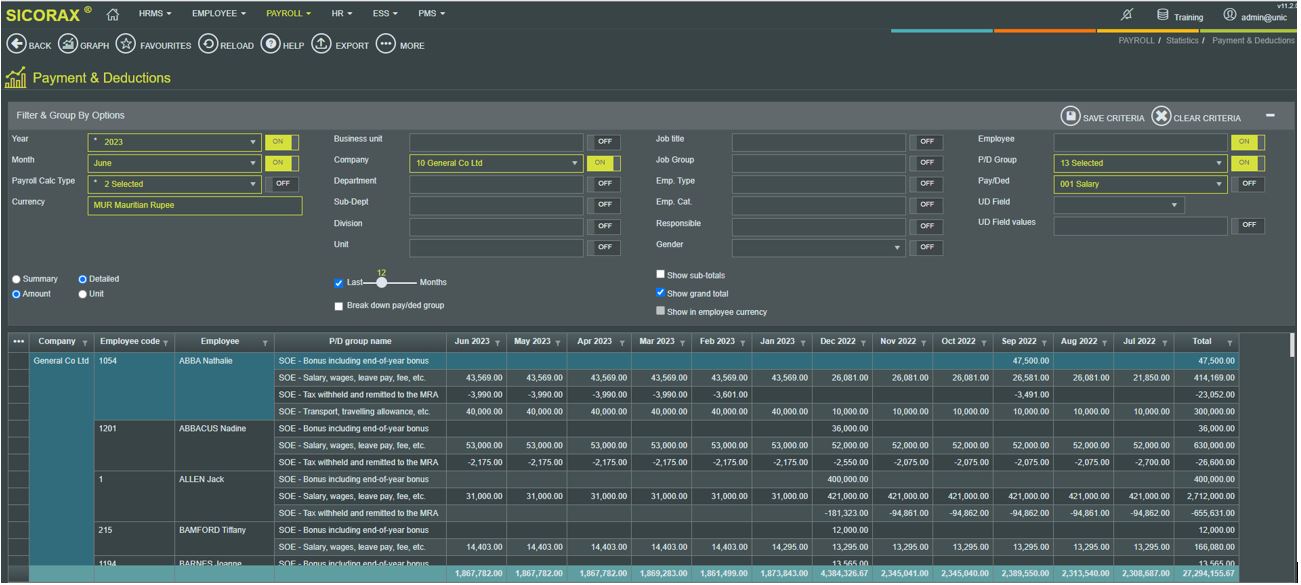
- Step 5: Below is an illustration of the detailed payroll historic figures from July 2022 to June 2023.
as indicated above, after replacing the criteria Year 2023 with 2025, the grid will display figures from July 2024 to June 2025. You are requested to verify the data
- Note: The PD Group name column is the same as the groups appearing on the Statement of Emoluments, you are therefore requested to verify and compare the totals
Break down of the PD Group
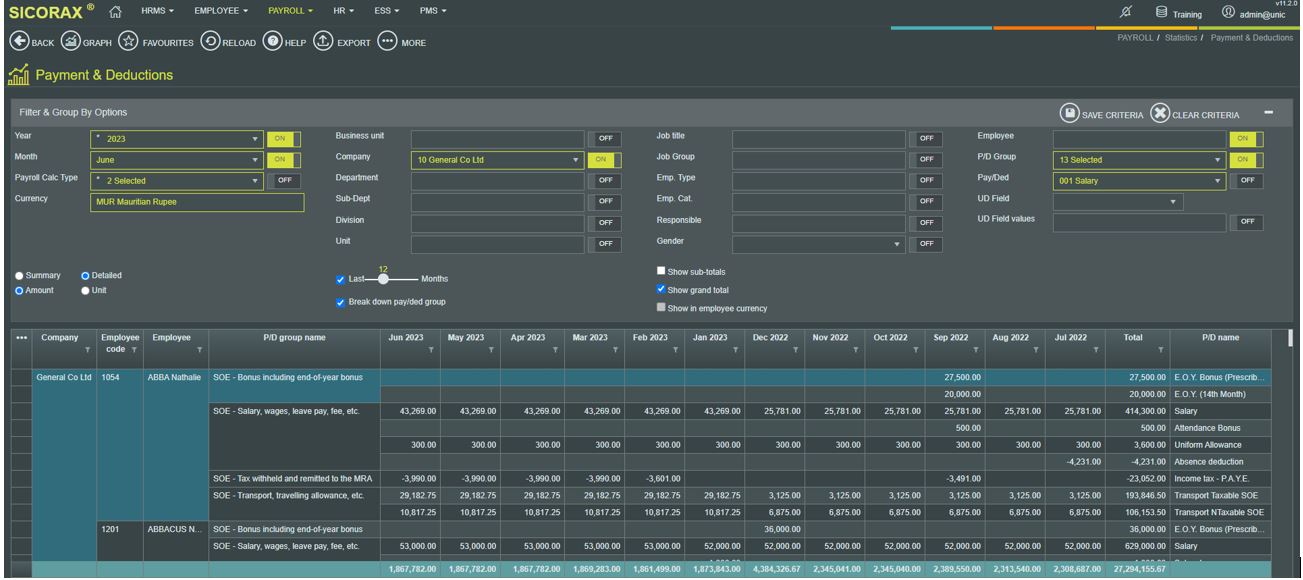
- To display the breakdown of the PD Group set the necessary selection, filtering and grouping as illustrated below
- Year choose 2023 activate ON (replace 2023 with 2025)
- Month choose June activate ON
- Payroll Calc Type Select Normal and Mid-December activate ON (It is compulsory to select Mid-December for the End of Year Bonus figures to be considered in the display)
- Company choose The required company (in the illustration company 01 has been chosen) activate ON
- Employee activate ON
- PD Group choose all the 13 SOE groups activate ON
- Pay/Ded choose 001 Salary
- Detailed select
- Last 12 months select
- Break down pay/ded group select
- Show Grand Total select
- Below is an illustration of the detailed break down of the PD Groups appearing on the Statement of Emoluments from July 2022 to June 2023.
as indicated above, after replacing the criteria Year 2023 with 2025, the grid will display figures from July 2024 to June 2025
How to verify PAYE figures for the fiscal period using the Income Tax Reconciliation Statement
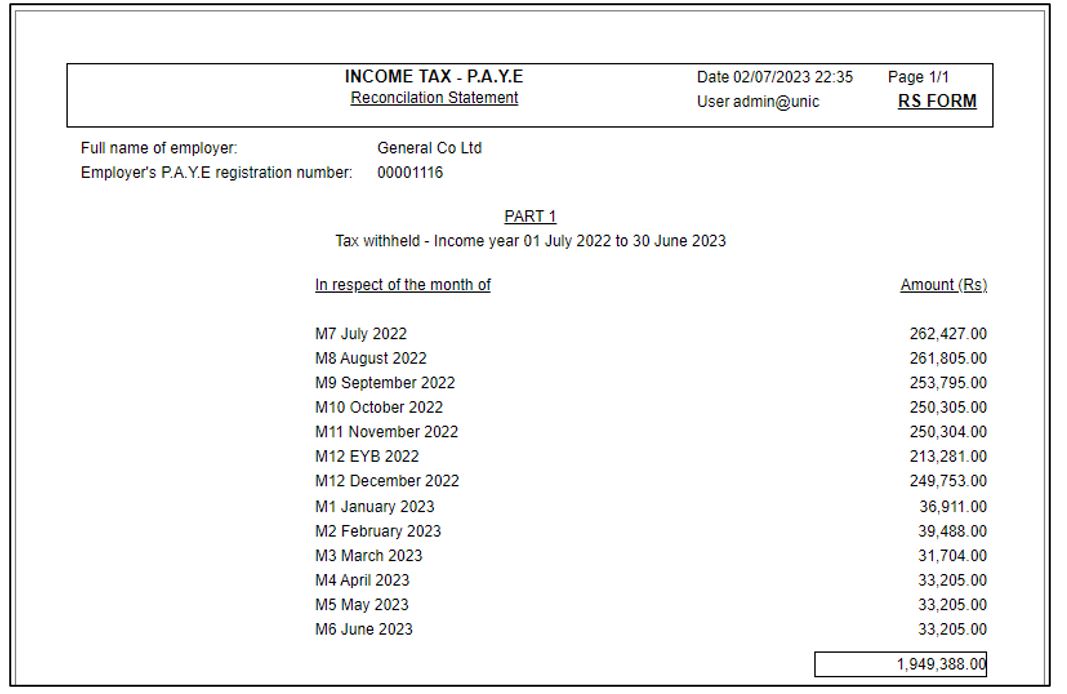
The Income tax reconciliation statement is used to verify the monthly PAYE which have been retained during the fiscal year. The figures should tally with the Yearly PAYE return.
Use the following steps to preview/print the reconciliation statement:
- Step 1: Go to Payroll
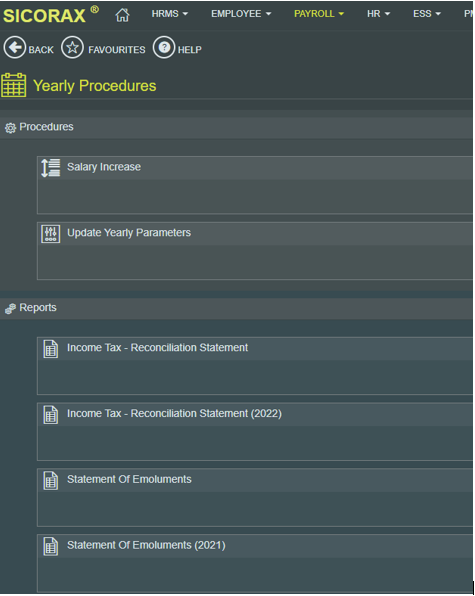
- Step 2: Click Yearly Procedures
- Step 3: Click Income tax reconciliation statement (2022)
- Step 4: Select the criteria Jul 2022 - Jun 2023 (For fiscal year 2025, select the criteria Jul 2024 - Jun 2025)
- Step 5: Click Preview
The following illustrates the Income tax reconciliation statement for PAYE:
as indicated above, after replacing the criteria Fiscal Year Jul 2022 - Jun 2023 with Jul 2024 - Jun 2025, the report will display PAYE figures from July 2024 - June 2025
