You are here: SKB Home » HRMS Payroll » Procedure Guide » Prerequisites for Monthly MRA PRGF Return
Prerequisites for Monthly MRA PRGF Return
How to prevent exporting a non-Mauritian citizen worker or a migrant worker to the Monthly MRA PRGF Return
It is compulsory to update the below before performing temporary payroll calculation of the month.
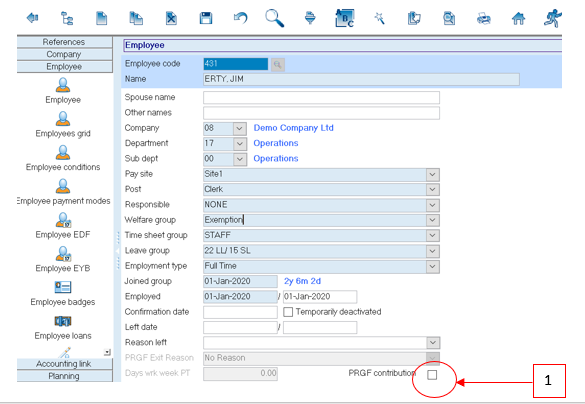
- Step 1: Untick PRGF flag in Employee
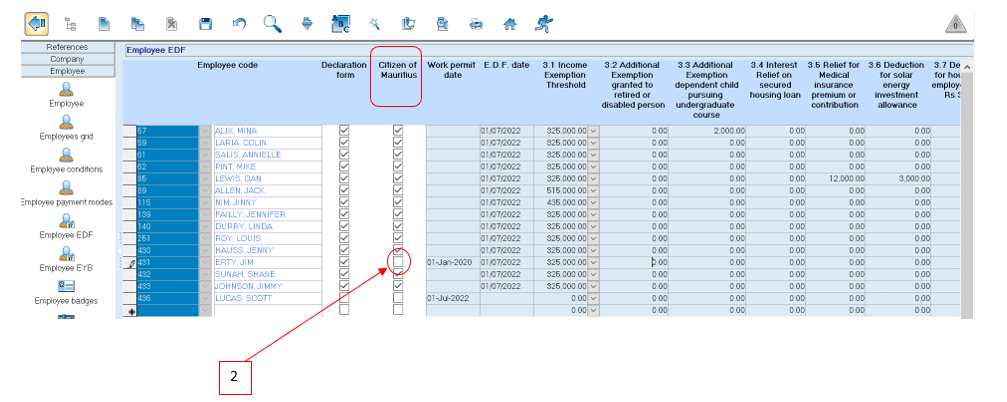
- Step 2: Untick Citizen of Mauritius Flag in Employee EDF. However, ensure to insert the work permit date
Monthly MRA PRGF Return
Before exporting the Monthly MRA PRGF Return from Sicorax Payroll, it is compulsory to update the below before performing temporary payroll calculation of the month.
- Reason no remuneration and commission paid for the month (As per MRA, this is the reason why no remuneration was paid to the Employee) It is compulsory if total monthly remuneration = 0 and no Pension Scheme is applicable
List of possible values given by the MRA for Reason no remuneration and commission paid for the month:
- Leave without pay (L)
- Unauthorised Leave without pay (U)
- Exit(ed) (D)
Update Reason no remuneration and commission paid for the month
To update the reason, follow the steps below.
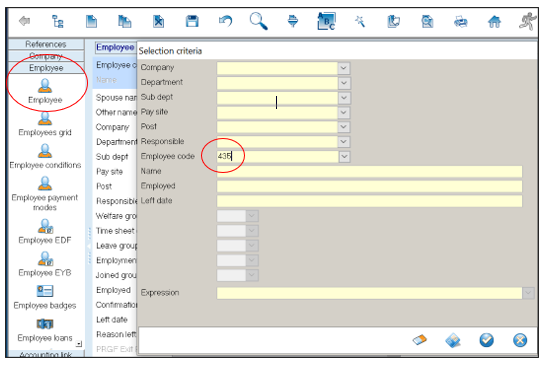
- Step 1: Go to Employee
- Step 2: Select employee
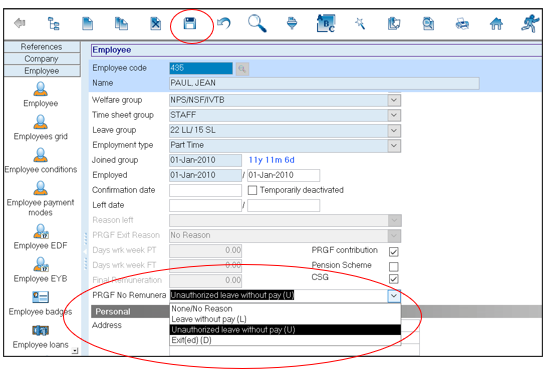
- Step 3: Choose PRGF no remuneration from the drop-down list
List of possible values given by the MRA for Reason no remuneration and commission paid for the month:
- Leave without pay (L)
- Unauthorised Leave without pay (U)
- Exit(ed) (D)
- Step 4: Click Save from on the toolbar
(Note: You must choose the Reason no remuneration and commission paid for the month for employees who are Temporarily Deactivated for the month)
To export the Monthly MRA PRGF Return after final run, use the steps below.
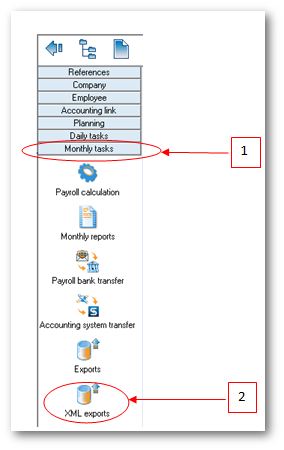
Step 1: Go to Monthly Tasks
Step 2: Click XML Exports icon
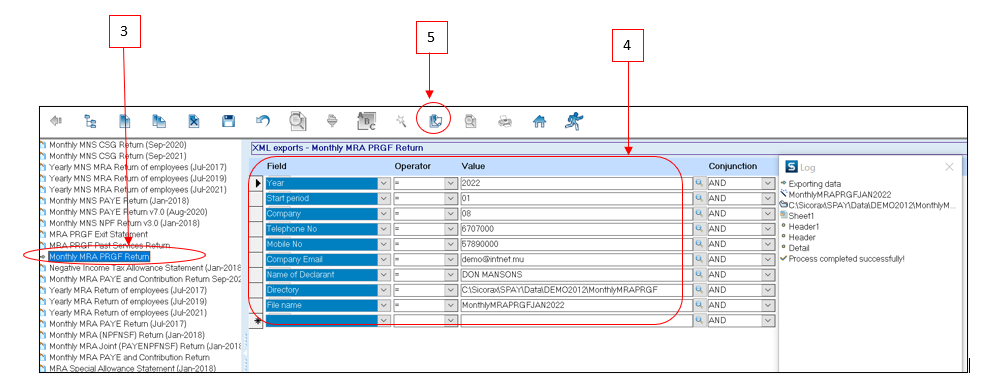
Step 3: Double-click Monthly MRA PRGF Return as per above illustration
Step 4: Insert the following criteria:
- Year: Choose calendar year from the list
- Start Period: Choose month from the list
- Company: Choose company from the list
- Telephone number: Insert number, it should be equal to 7 numeric characters
- Mobile number: Insert number, it should start with the figure 5 and should consist of 8 numbers;
- Company Email address: Insert the contact email address of the company
- Name of Declarant: Insert the name, it should bear UPPER CASE letters and/or numeric characters (max 50 characters)
- File name: Insert file name, it should be less than 21 characters long
- Directory: Click lookup icon to browse and select the folder to which you want to export the file
Step 5: Click Export button from the toolbar
A sample of the csv file is shown below:
