You are here: SKB Home » HRMS Payroll » hrmsprocguide » Statement of Emoluments
This is an old revision of the document!
Statement of Emoluments and Yearly Returns
Before printing the Statement of Emoluments and exporting the MNS/MRA Yearly Returns you must verify the following:
- Company details
- Payments/deductions parameters
- Payroll historic (July 2018 to June 2019) using the statistics module
Company details
To verify your company details proceed as follows:
- Step 1: Go to Payroll
- Step 2: Click Settings
- Step 3: Click Companies
- Step 4: Select the company
- Step 5: Verify the PAYE, NPF, BRN
Image
Payments/deductions parameters
To verify your Payments/deductions parameters proceed as follows:
- Step 1: Go to Payroll
- Step 2: Click Settings
- Step 3: Click Payments/deductions
- Step 4: Click the SOE section
- Step 5: For each payments/deduction check the PAYE indicator, Tax column & SOE column
- Step 6: Should you need to amend the PAYE indicator, Tax column & SOE column you are requested to call our HRMS support team
Image
Payroll historic
To verify the payroll historic using the Statistics module proceed as follows:
- Step 1: Go to Payroll
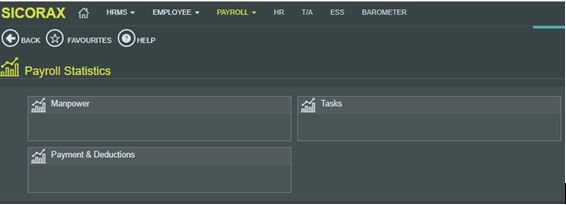
- Step 2: Click Statistics
- Step 3: Click Payments/deductions
To set the necessary criteria proceed as follows:
- Step 1: Click Payments & Deductions
- Step 2: Set the necessary selection, filtering and grouping as illustrated below:
- Step 3: Verify the detailed payroll historic figures from July 2018 to June 2019 as illustrated below:
Image Employee data
Income Tax Reconciliation Statement
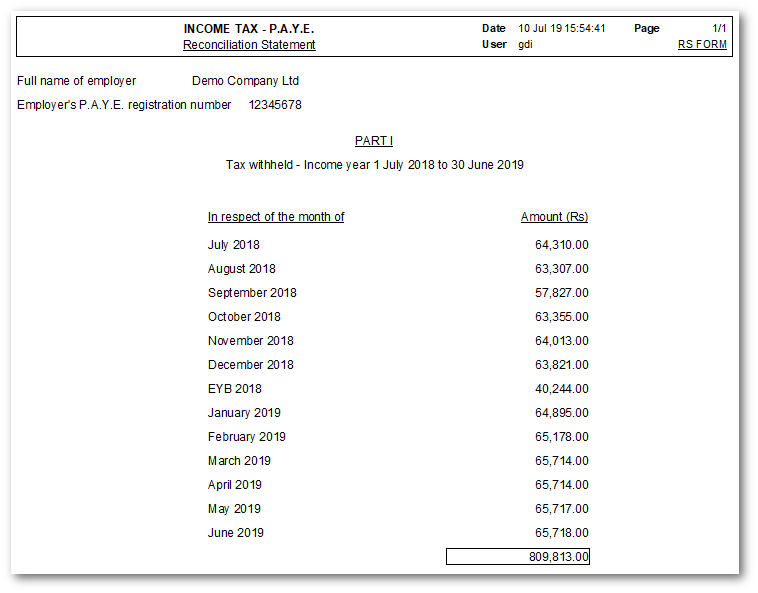
The Income tax reconciliation statement is used to verify the monthly PAYE figures which have been retained during the fiscal year. The figures should tally with the Monthly PAYE return.
Use the following steps to preview/print the statement:
- Step 1: Go to Payroll
- Step 2: Click Yearly Procedures
- Step 3: Click Income tax reconciliation statement
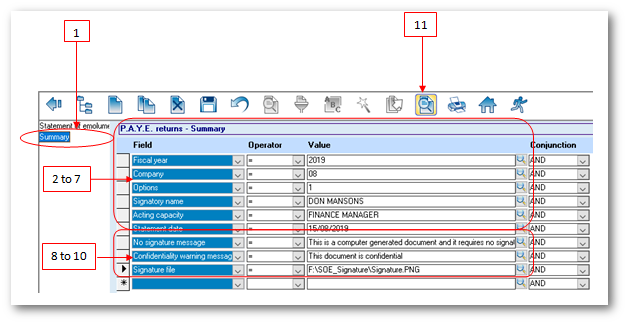
- Step 1: Double-click Summary from the tree view
- Step 2: Choose Fiscal year 2019
- Step 3: Choose Company code from the drop-down list
- Step 4: Choose Options 0 to print for all employees; 1 for active employees only; 2 for leavers only
- Step 5: Insert value of Signatory Name
- Step 6: Insert value of Acting Capacity
- Step 7: Insert value of Statement Date criteria
- Step 8: Optional criteria: No Signature Message is used print a no signature message automatically on the SOE hence, no manual signature is required. To do so insert the message in the value field e.g This is a computer generated document and requires no signature.
- Step 9: Optional criteria : Confidentiality warning message allows to print a confidential notice automatically on the SOE, to do so insert the confidential notice in the value field e.g This document is confidential.
- Step 10: Optional criteria : Signature file is used to print the scanned signature automatically on the SOE. To do so
Write your signature on a piece of paper, the signature must be within an area of 4 inch width x 1 inch height, Scan the paper, Save the file in bmp of jpg format, Browse the file location
- Step 11: Click Preview on the toolbar
The following illustrates the Summary report:


